Skip to end of metadata
Go to start of metadata

You are viewing an old version of this page. View the current version.

Compare with Current View Page History

« Previous Version 2 Current »

This guide assumes that you have already:

If you have not completed the above steps, use the individual links, or please visit ControlRoom Setup Overview


Detailed Setup Instructions

Please note, ControlRoom Hub must be running to maintain the connection with Pro Tools. It can be minimized, but not closed.

Map ControlRoom Midi Tools to midi-enabled third party plugins

There are numerous midi tools in ControlRoom that can be mapped to control the parameters of midi-enabled third party plugins. Follow the steps below to use the Hub and Pro Tools to map the FX Cube to control a few parameters in the FabFilter Timeless 2 delay plugin.

It’s helpful here to use Command-Tab (Mac) or Alt-Tab (Windows) to quickly switch back and forth between the Hub and Pro Tools windows.

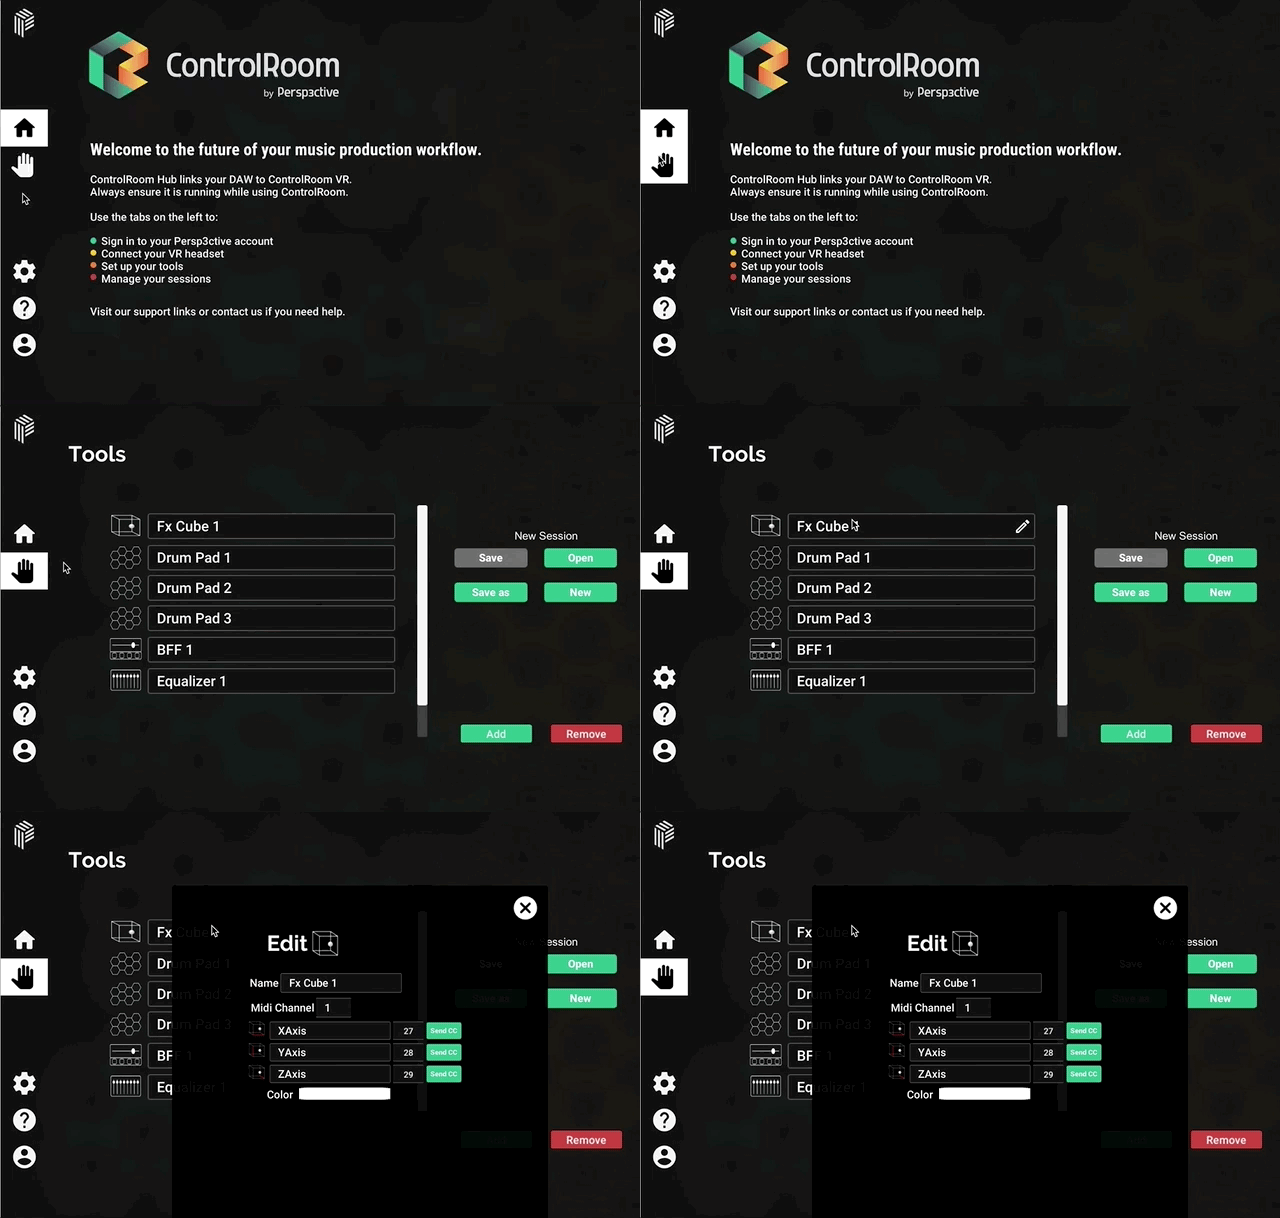
 Step One: In the Hub, open the Tools page and click the FX Cube tool

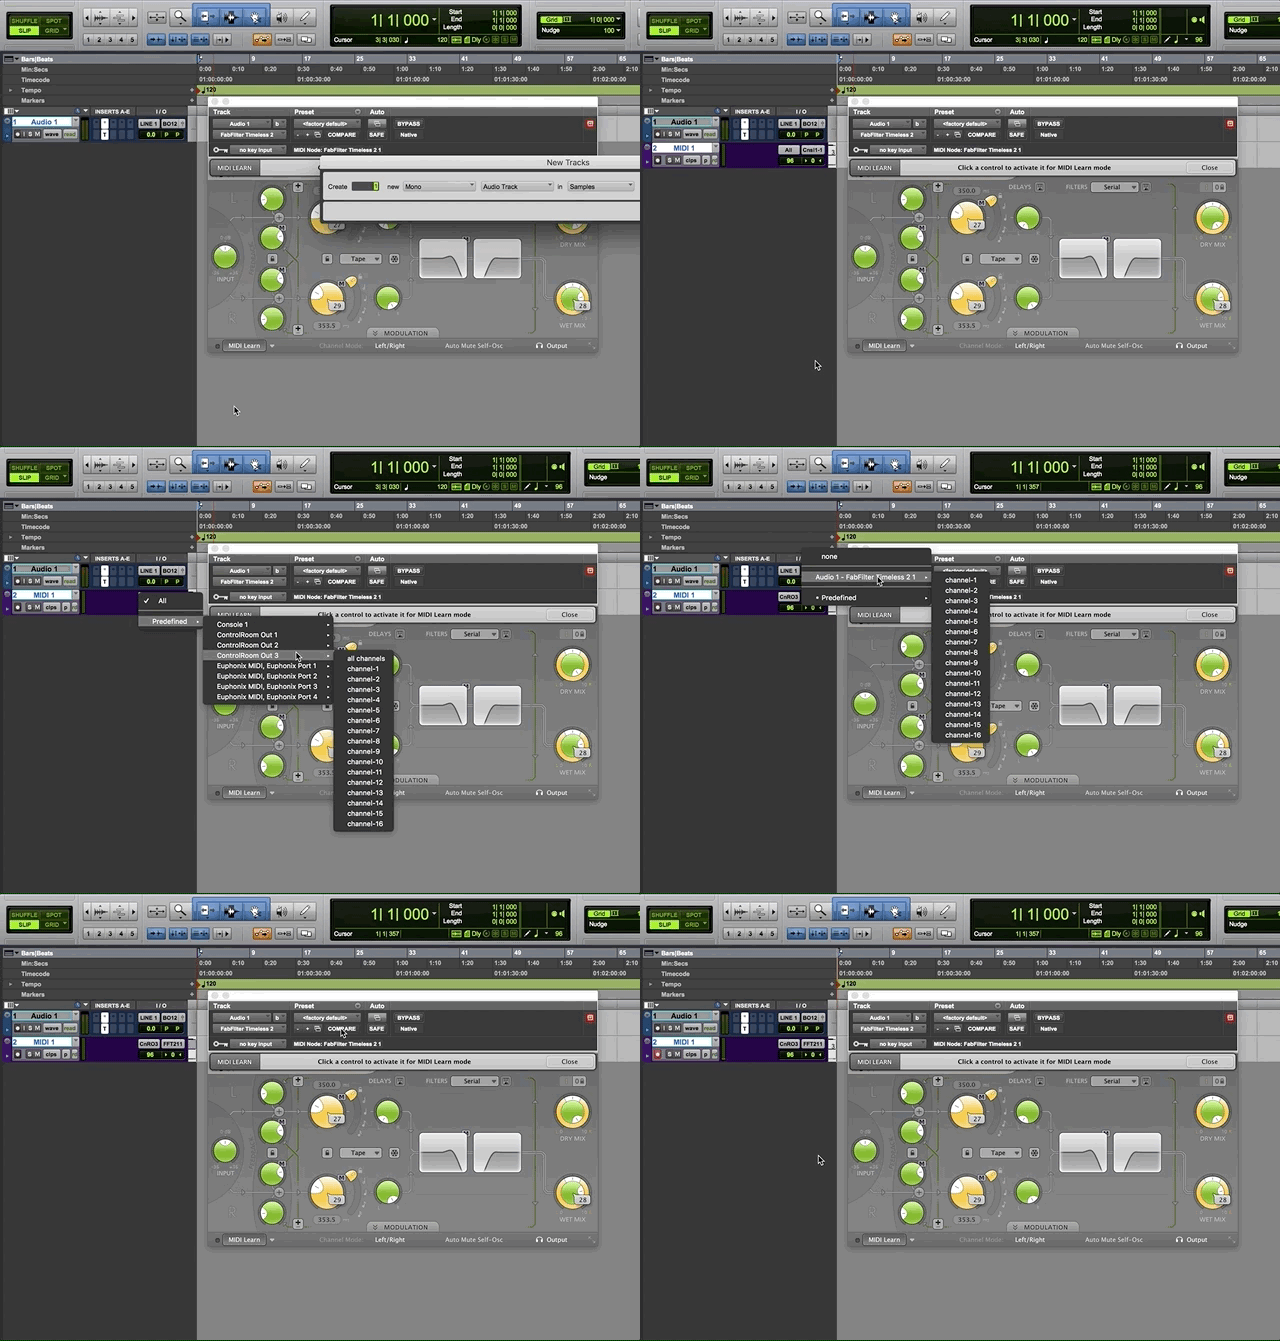
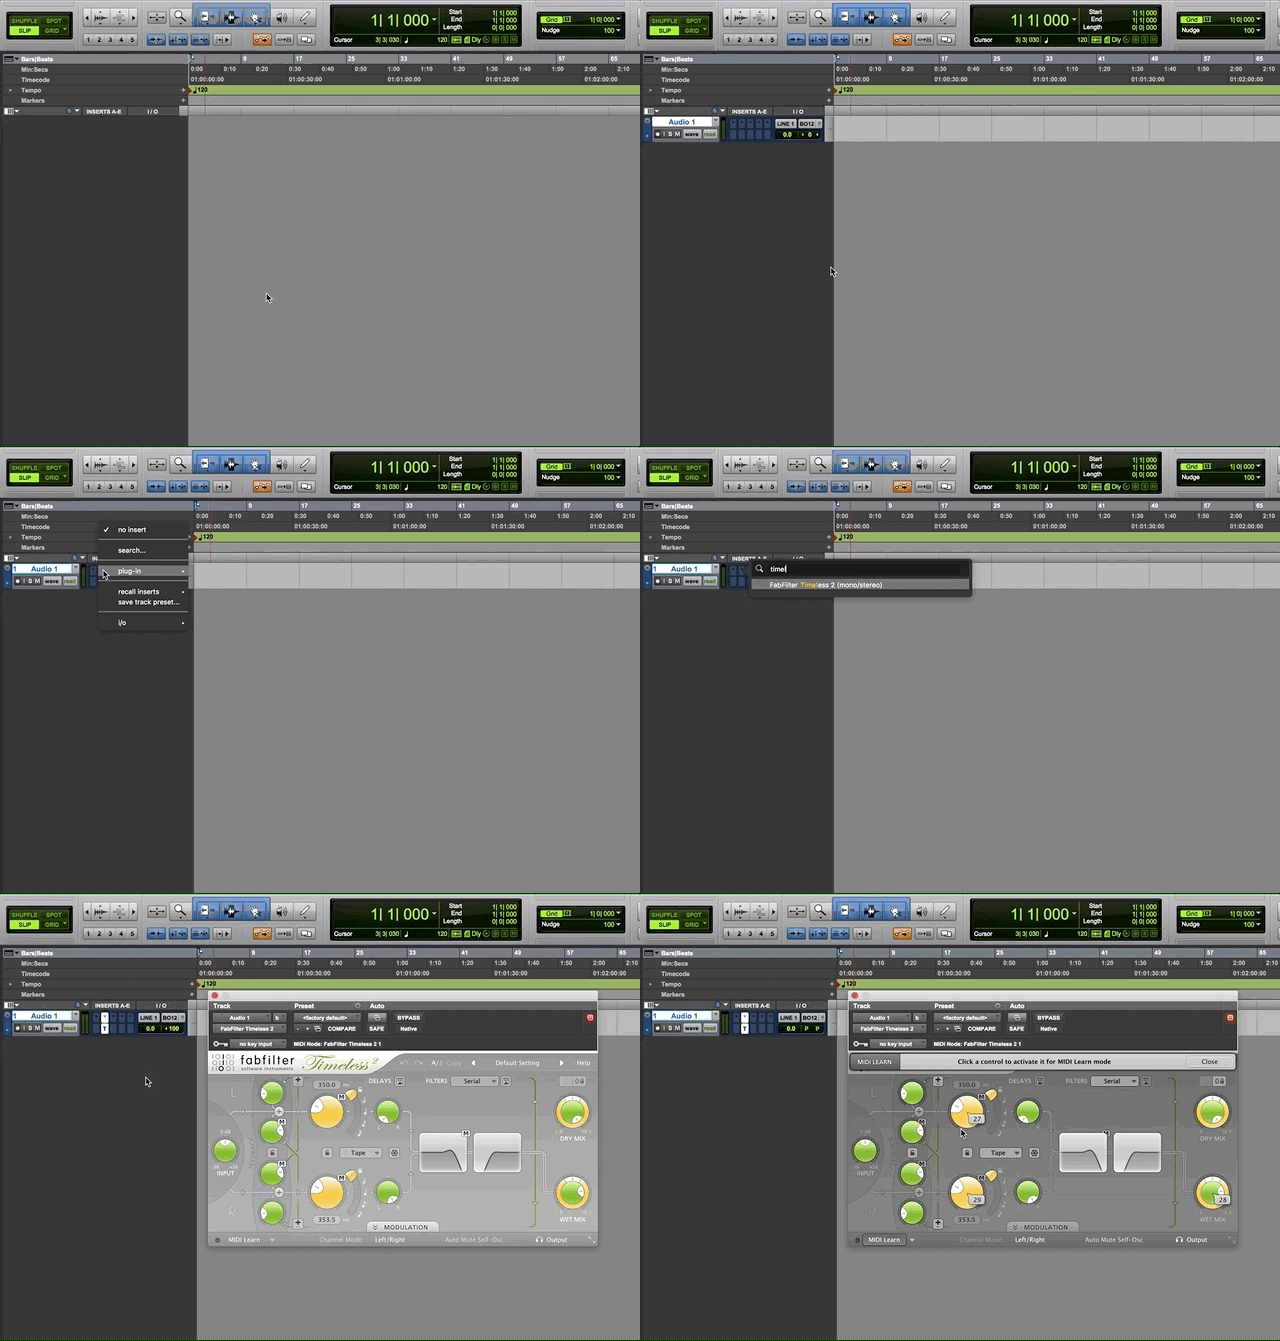
 Step Two: In Pro Tools, add a midi-enabled plugin and get it ready to map
  • Create a new audio or aux track and insert FabFilter’s Timeless 2 delay plugin.

  • Click Midi Learn to prepare it for midi mapping

  • Create a new midi track

    • Set its input to ControlRoom Out 3 - All Channels

    • Set its output to the FabFilter Timeless plugin

    • Record-enable the midi track

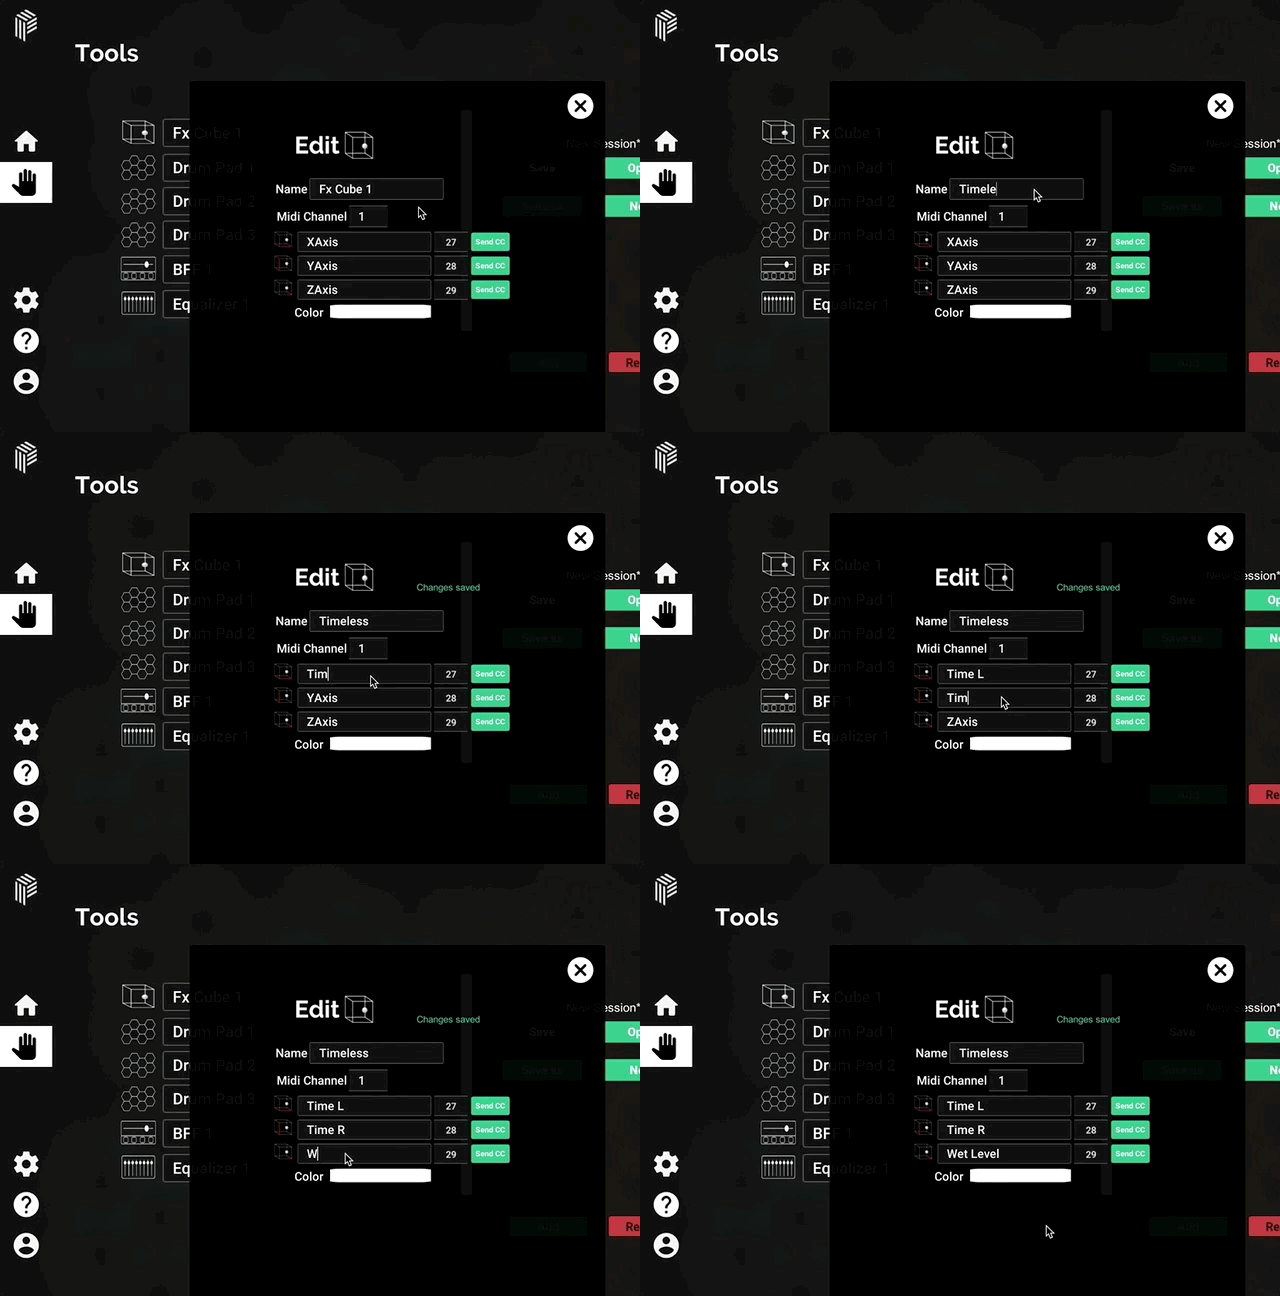
 Step Three: In the Hub, name the XYZ axes with the intended parameters

For this example, label them as follows:

  • Name: “Timeless”

  • X Axis: “Time L

  • Y Axis: “Time R

  • Z Axis: “Wet Level

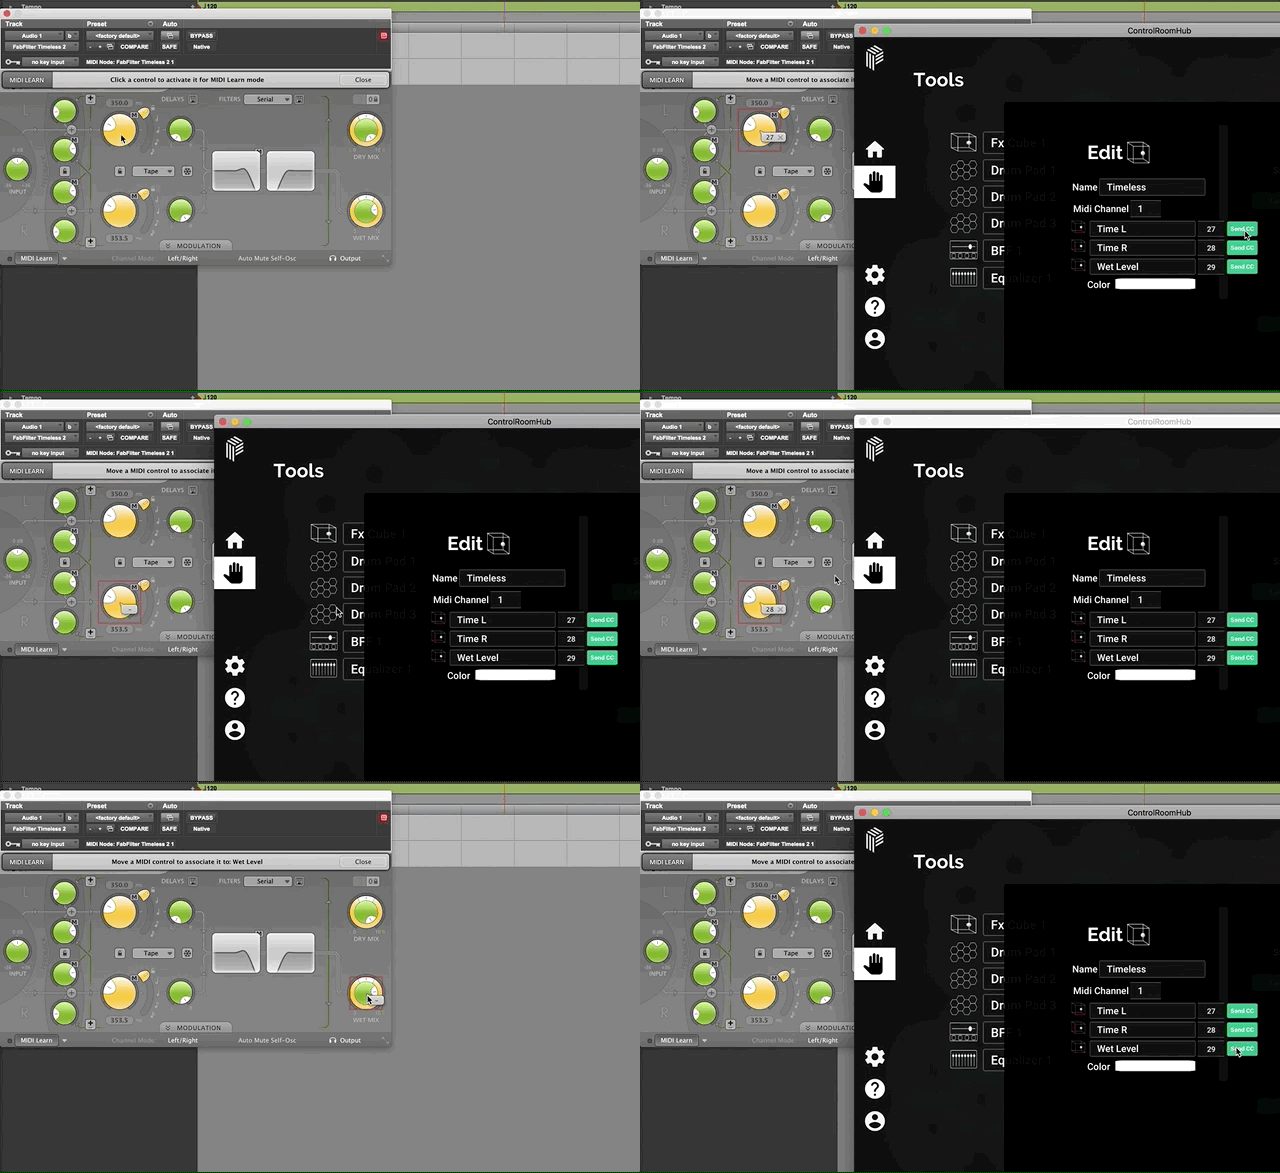
 Step Four: Map the parameters
  • Switch back to Pro Tools and bring up the Timeless window

  • Click the Delay Time L knob in the plugin window. This selects it with a rectangle.

  • Switch back to the Hub, and click the first Send CC button to map the X axis to Delay Time L

  • Switch back to Pro Tools, and click the Delay Time R knob to select it

  • Switch back to the Hub, and click the second Send CC button to map the Y axis to Delay Time R

  • Follow suit to map the wet mix knob. In Pro Tools, click the Wet Mix Knob to select it, and in the Hub click the third Send CC button to map the Z axis to Wet Level

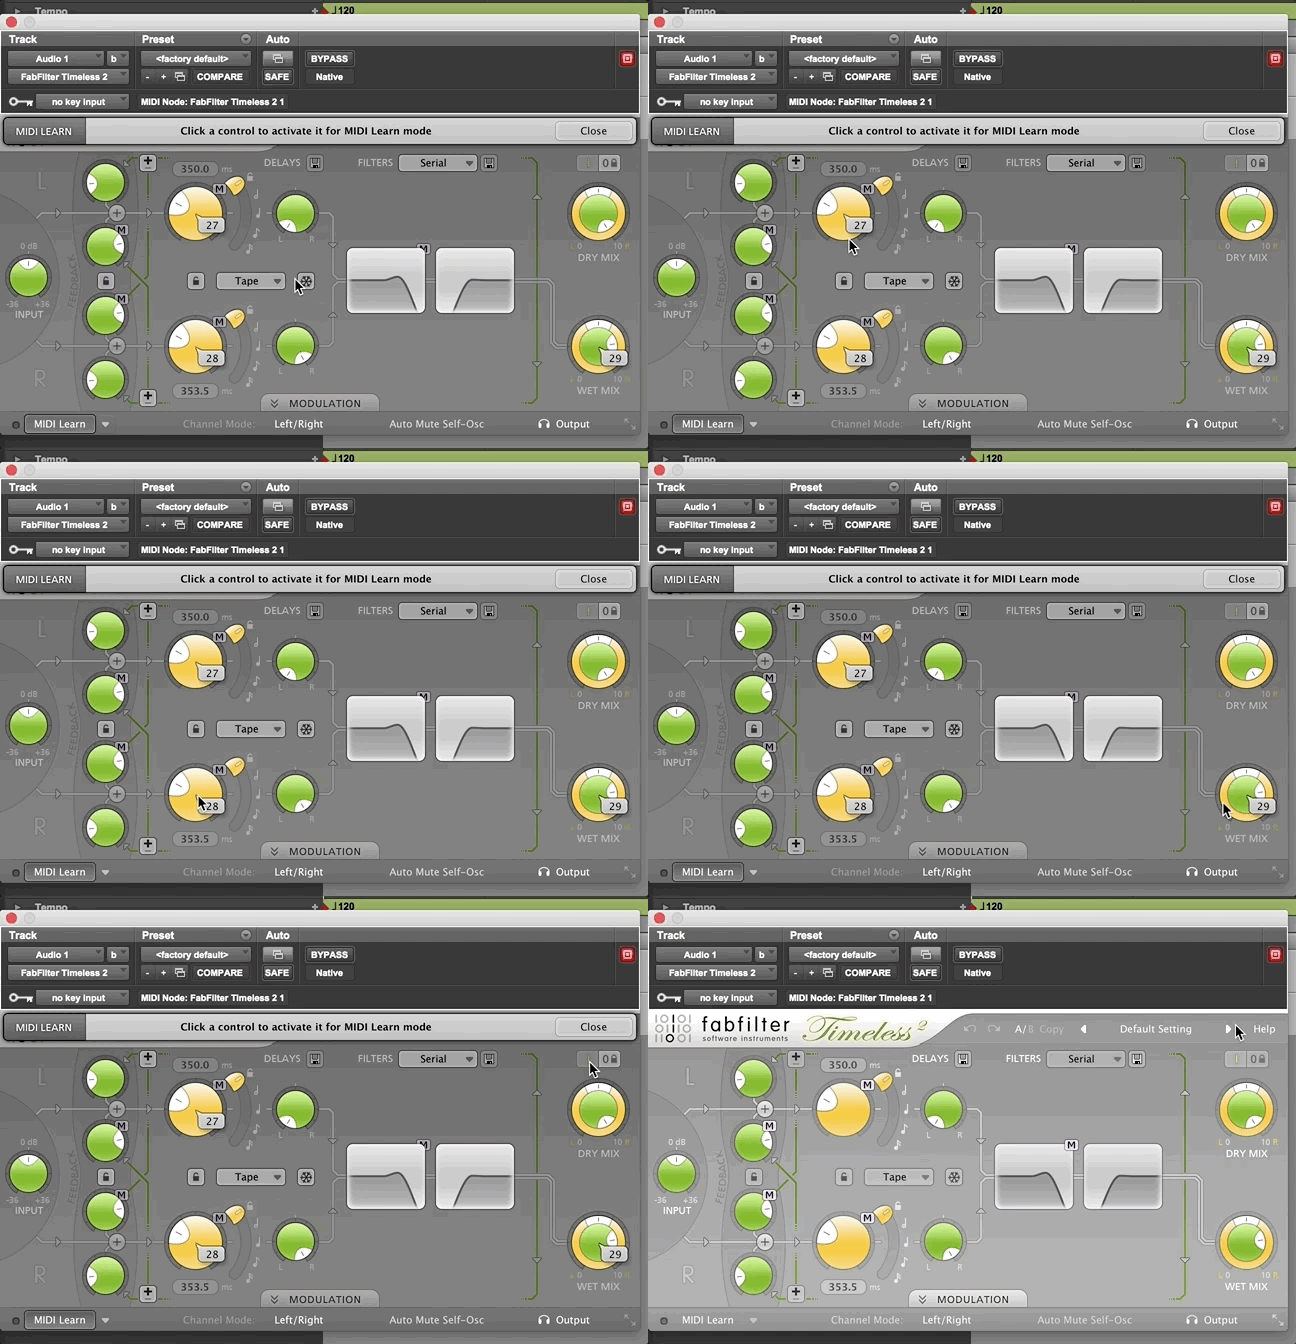
  • In Pro Tools, confirm the 3 mappings you just made by clicking on a neutral part of the plugin window and looking for the CC numbers attached to each of those parameters.

  • Exit Midi Map mode by clicking the Close button at top right or the MIDI Learn button at bottom left.

 Step Five: Open the FX cube in VR and have fun

Once you have mapped the three parameters, this mapped tool will be available to you in ControlRoom VR.

  • In VR, press the menu button on your left controller to bring up the menu, then select the Tools page, and turn on the FX cube you just mapped, which should be named Timeless

  • Start playback either on the Console, or using your left wrist transport

  • Move the ball in the FX cube around to fluidly control all three of those parameters simultaneously

 Step Six: Save your ControlRoom Hub session

We recommend that you save your ControlRoom Hub session early and often any time you are mapping midi tools to Pro Tools.

We recommend that you save your ControlRoom Hub session early and often any time you are mapping midi tools to Pro Tools.


TL;DR

  1. Ensure you’ve completed all the steps in the Setup Process

  2. Use the VR Console to control the Pro Tools built-in mixer

  3. Use the VR Spatial Mixer and Plugin Tablet to control the Channel and Master AAX plugins

  4. Use the Hub to manually map MIDI tools like BFF and FX Cube to compatible third party plugins

Have more questions about this process? Check out our FAQ page.

Still have questions about setting up the Hub or have suggestions about how we could improve this page? Try our customer service portal.
  • No labels