This page covers using ControlRoom with Pro Tools.
This guide assumes that you have already:
noteIf you have not completed the above steps, use the individual links, or please visit ControlRoom Setup Overview
Overview
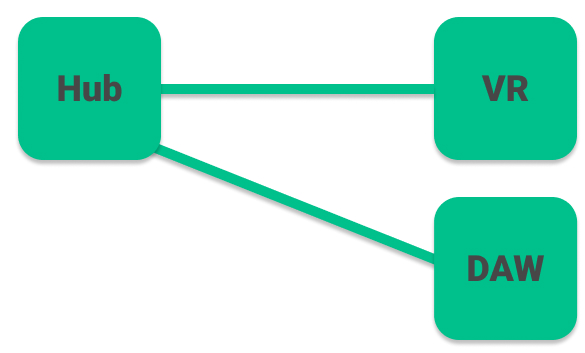
ControlRoom connects with Pro Tools in three ways simultaneously:HUI Control Surface (VR Console for the Pro Tools built-in mixer) General MIDI Device (Map VR MIDI tools to compatible third party plugins) Direct Connection to ControlRoom AAX Plugins (Spatial Mixer, Plugin Tablet, Spectralyzer)
|
Detailed Instructions
Please note, ControlRoom Hub must be running to maintain the connection with Pro Tools. It can be minimized, but not closed. |
Use the VR Console to control the Pro Tools mixer
The VR console in ControlRoom is your home base for interacting with your Pro Tools session. It provides access to the Pro Tools built in Volume, Pan, Solo, Mute, Record, Sends (A-E only), and Automation mode. You can navigate through the tracks in your session using the Nudge and Bank buttons, and control the main functions of the Pro Tools transport.
In VR, press the menu button on your left controller to bring up the menu, then select the Tools page, and turn on the Console. |
By using the various sections of the console, you can control the Pro Tools built in mixer. Functions outlined below: Pro Tools Parameter | Console Control |
|---|
Volume | Large Fader | Pan | Pan Knob (use the L-R button on the console to switch between L Pan and R Pan for stereo output tracks) | Solo | S button | Mute | M button | Record Arm (for each individual track) | R button | Sends | Select Channel Mode A-E for sends 1-5. This will switch each track’s large fader to control the send level. (Select Vol to return to normal console mode.) | Track Automation Mode | Auto button at top of the channel strip. Once selected with the trigger, use the joystick on your right Oculus controller to select the desired automation mode. | Transport | Transport section at the front of the console. Play and stop can also be controlled at any time using the large transport button on your left wrist Record will arm transport record. Subsequently starting playback will record over any record-armed individual tracks with valid inputs. Be careful not to overwrite any important audio with this function. |
|
Spatial Mixer and Plugin Tablet

Every instance of the ControlRoom Channel AAX plugin can be controlled from VR with the Spatial Mixer and Plugin Tablet. This provides powerful control over the plugin from within VR, including the Compressor, EQ, Spatial Panner.
Once you have launched your DAW and opened a session file, you’ll need to add an instance of ControlRoom Channel to any and every track that you’d like to control with the Spatial Mixer or Plugin Tablet. We recommend adding it as the last insert in your plugin chain, so that parameter changes in ControlRoom Channel will not affect any processing coming afterwards. Please refer to your Pro Tools manual for instructions on inserting plugins. |
Create a stereo Master track for your main output, and insert only one instance of ControlRoom Master onto this track. The master volume will be controllable via the Master Fader on the VR Console. ControlRoom Master is designed to be inserted only one time in your session - on your main stereo output. This is because it is the source of timecode, bar|beat information, and master output level metering in ControlRoom VR. If you add more than one instance of ControlRoom Master to your session, proper display of these functions in VR cannot be guaranteed. |
|
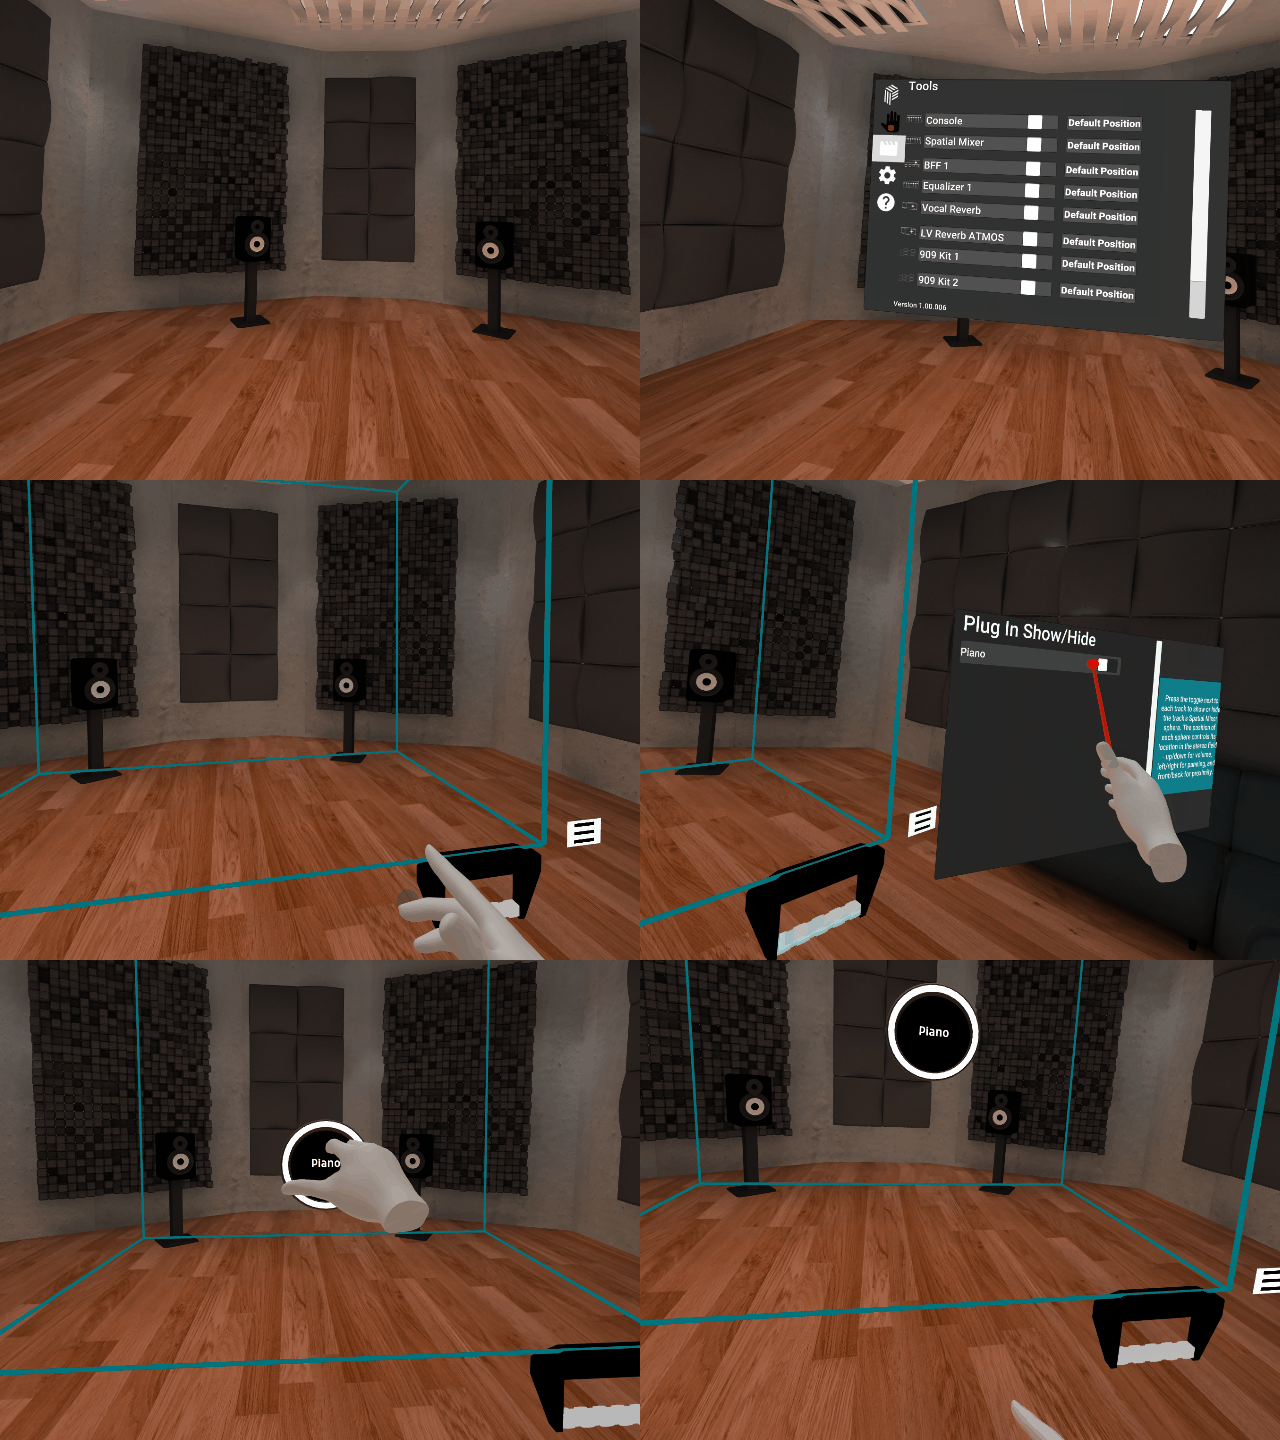
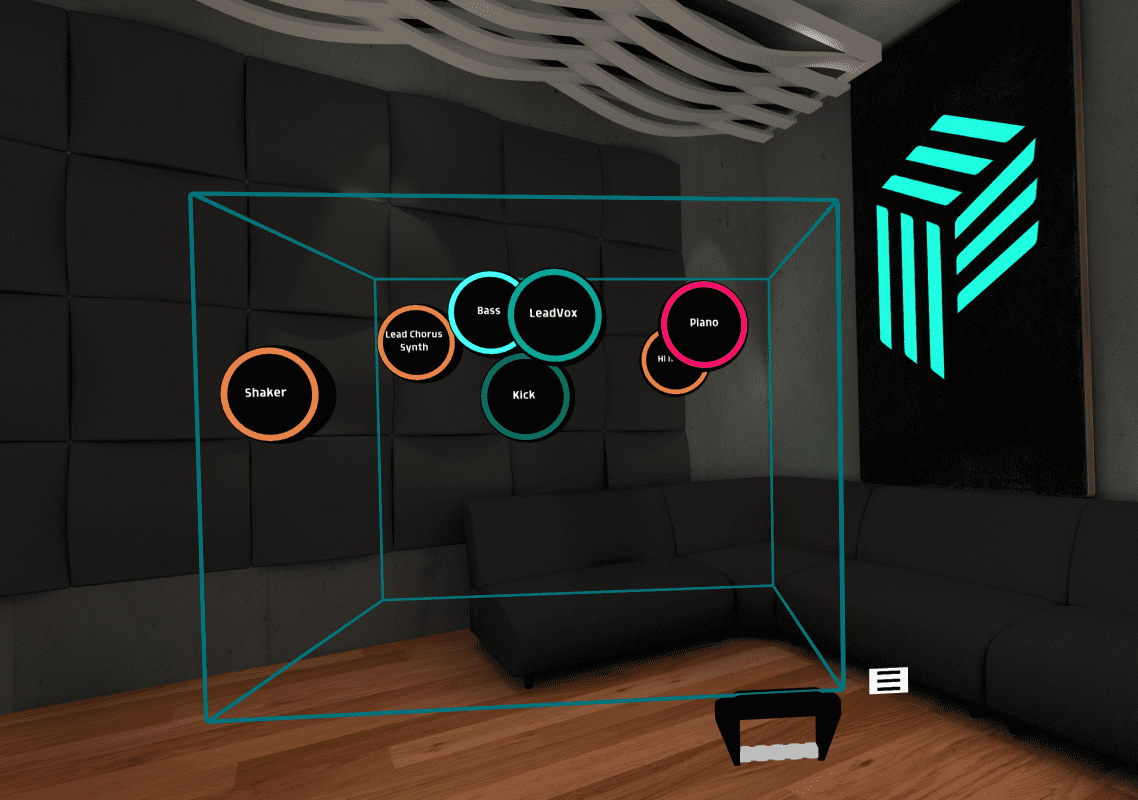
In VR, press the menu button on your left controller to bring up the menu, then select the Tools page, and turn on the Spatial Mixer. Press the menu button at the lower right of the Spatial Mixer, then toggle on any tracks you’d like to control with the Spatial Mixer. Close this menu when you are finished, and return back to it any time you’d like to display different tracks. Move each track sphere up/down for volume, left/right for panning, and front/back for Proximity.
 By turning on plugin automation in Pro Tools, you can automate proximity, panning, and level simultaneously for an unprecedented level of control over your mix. |
|
In VR, press the menu button on your left controller to bring up the menu, then select the Tools page, and turn on the Plugin Tablet. Press the menu button at the top right of the tablet to select the track you’d like to control with the Plugin Tablet. Close this menu when you are finished, and return back to it any time you’d like to display different tracks. Use the buttons along the top of the tablet to switch between Compressor and EQ control over the selected track.
EQ ControlEach of the 10 bands of the EQ will appear front to back as colored lines. The white line at the rear is the overall EQ curve, summed from the combination of the 10 adjustable bands. Individual bands can be toggled on/off using the X or A button while hovering over each point, or while grabbing it with the trigger. Each EQ band’s point can be moved up/down for Gain and left/right for Frequency. Push the joysticks up/down while grabbing a point to adjust that band’s Q value.
Compressor ControlAll parameters of the Channel compressor are shown here. Toggle pyramid on/off by selecting the pyramid icon at the top right of the tablet. The pyramid allows you to control Ratio, Threshold, Attack Time, and Release Time Height of the tip of the pyramid for Ratio Height of the middle line for Threshold Horizontal position of the bottom left and right sides for Attack Time and Release time, respectively.
|
Map ControlRoom Midi Tools to midi-enabled third party plugins
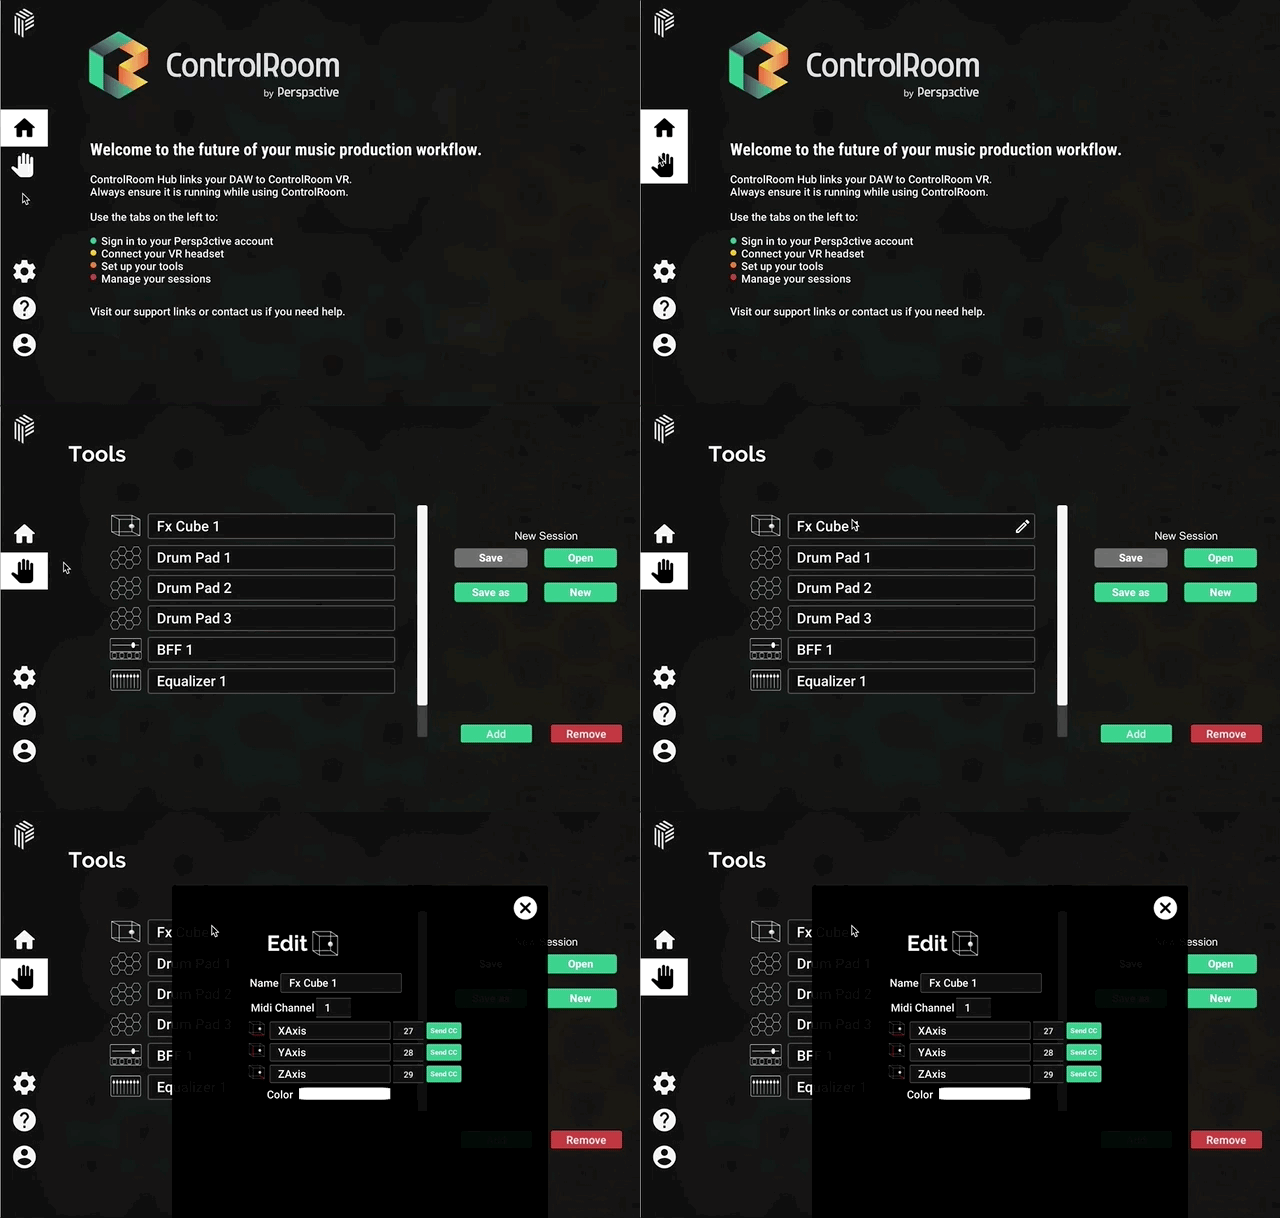
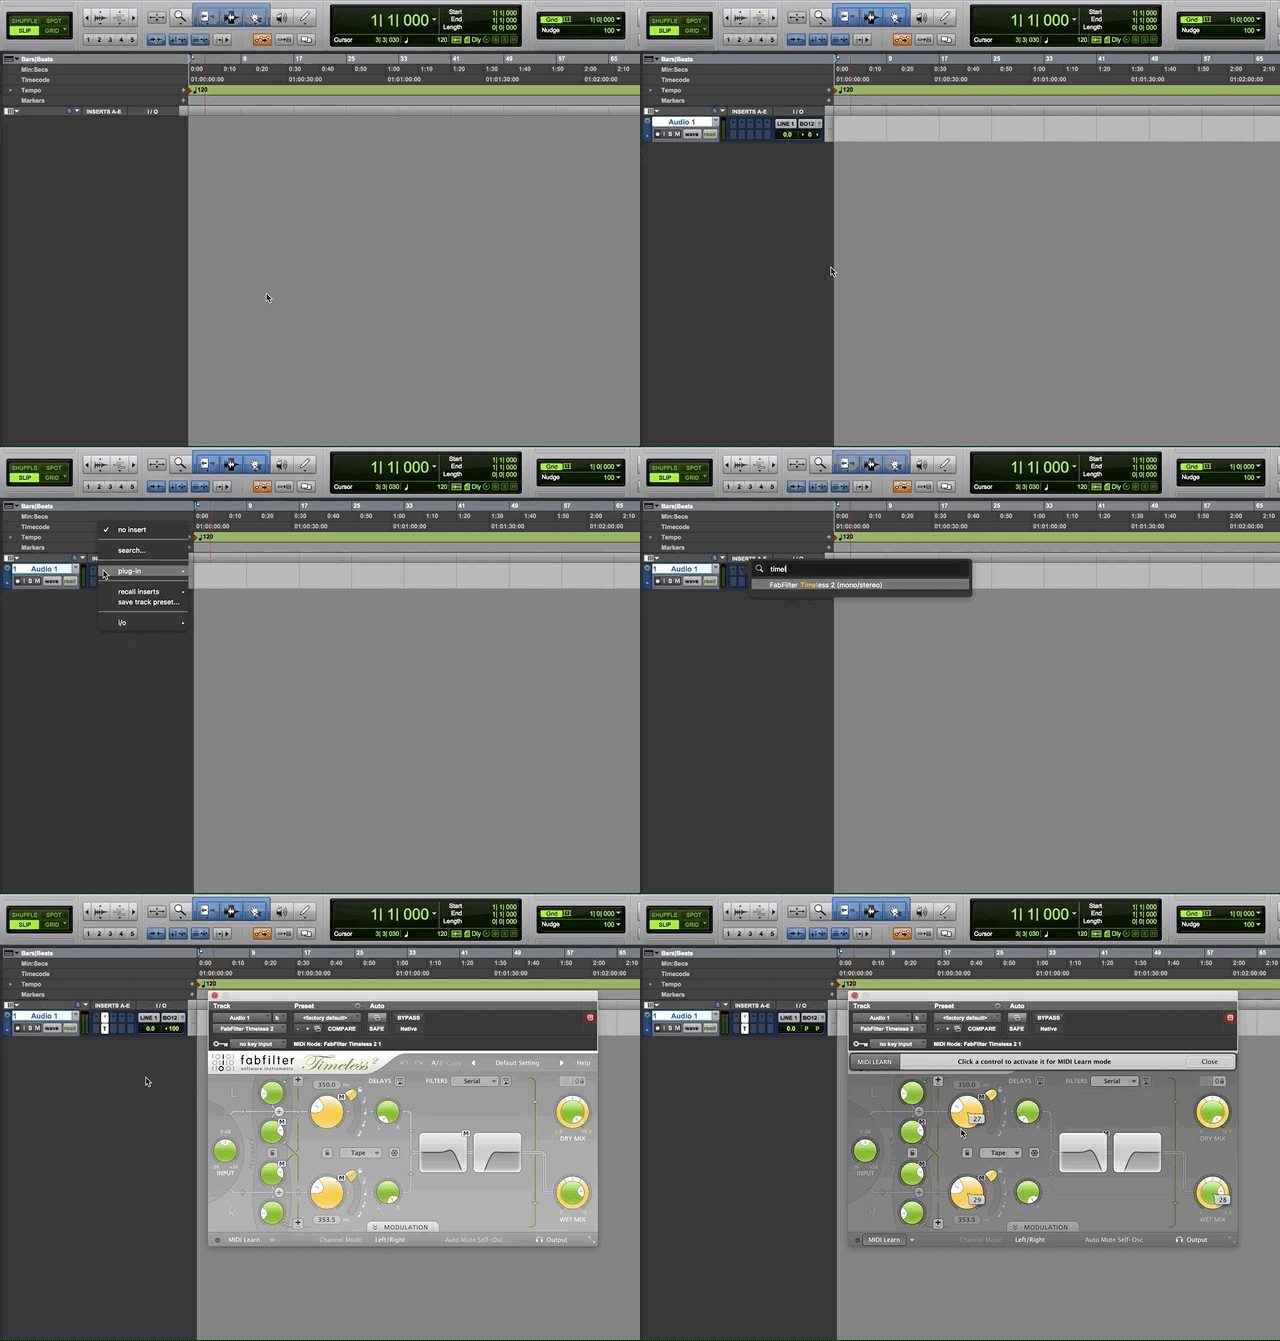
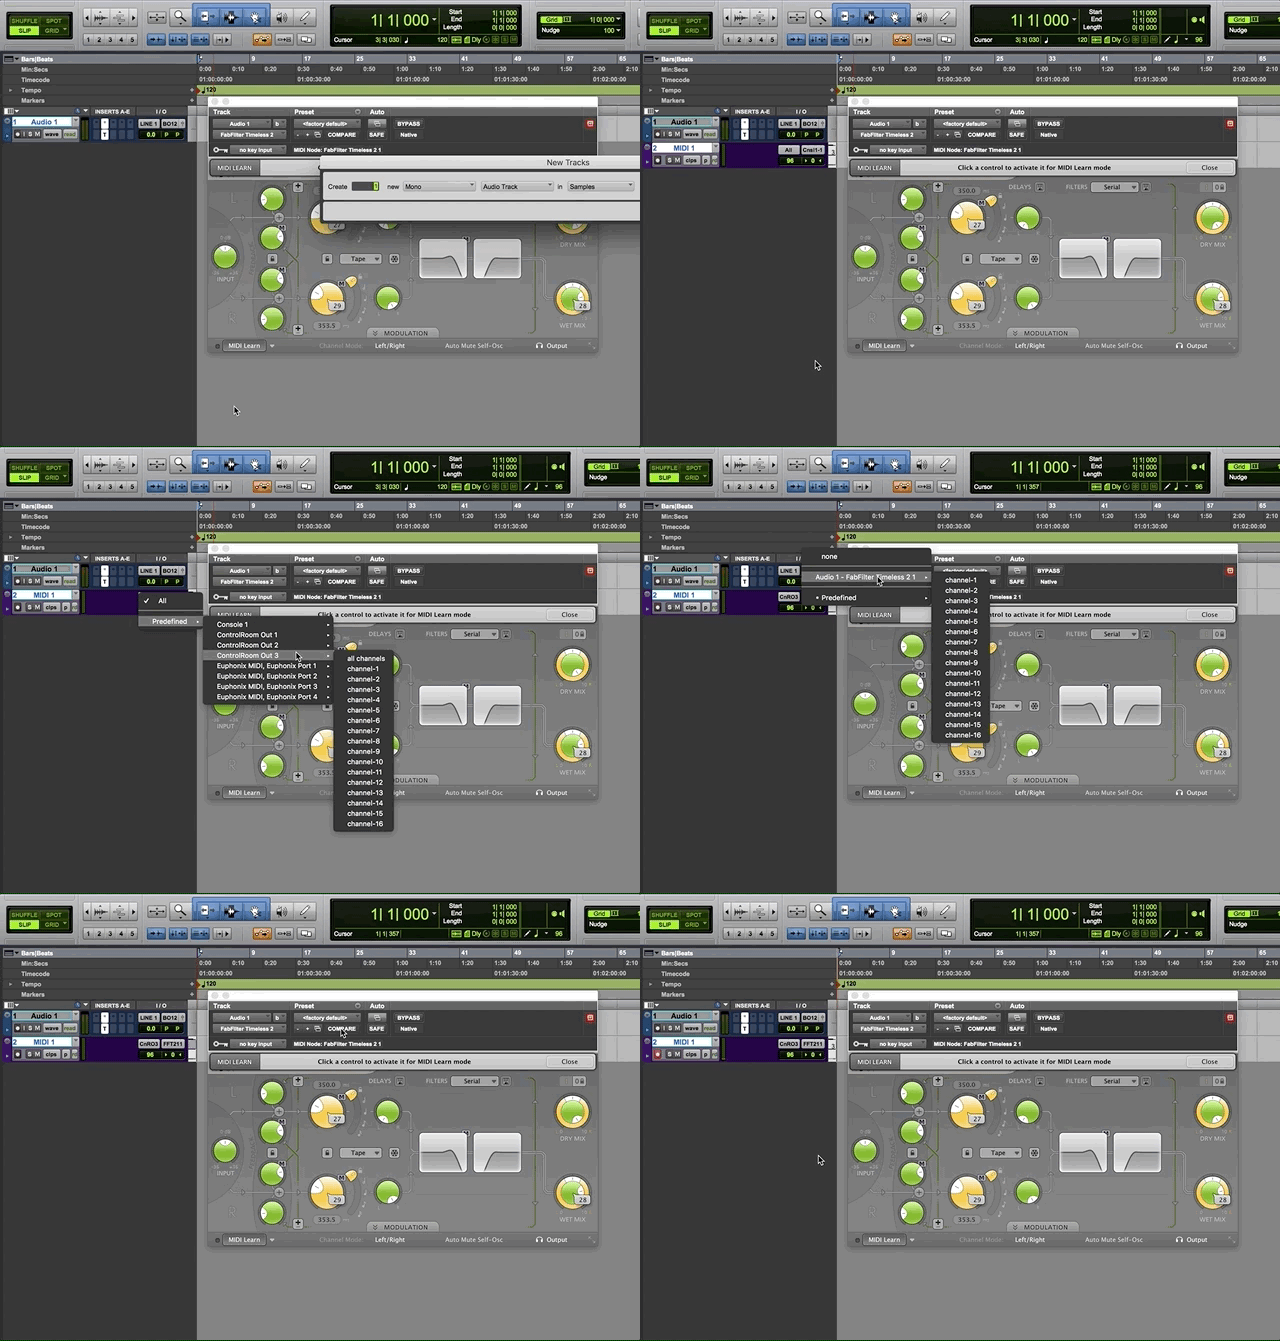
There are numerous midi tools in ControlRoom that can be mapped to control the parameters of midi-enabled third party plugins. Follow the steps below to use the Hub and Pro Tools to map the FX Cube to control a few parameters in the FabFilter Timeless 2 delay plugin.
It’s helpful here to use Command-Tab (Mac) or Alt-Tab (Windows) to quickly switch back and forth between the Hub and Pro Tools windows. |
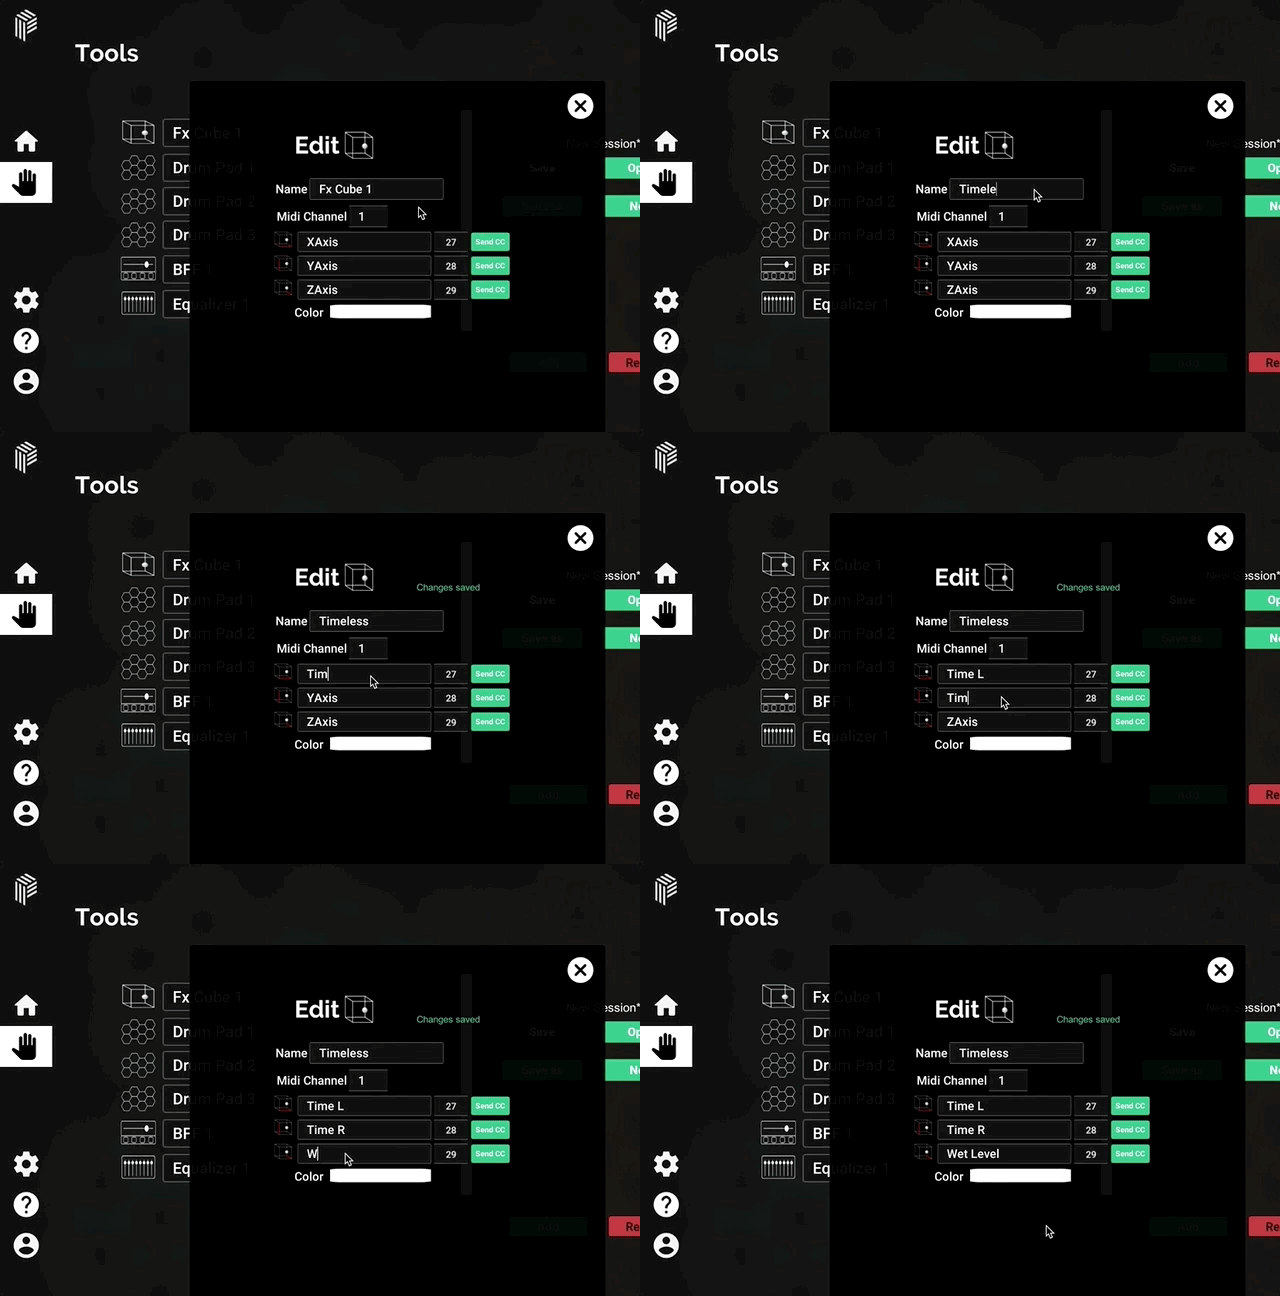
For this example, label them as follows: Name: “Timeless” X Axis: “Time L” Y Axis: “Time R” Z Axis: “Wet Level”
 |
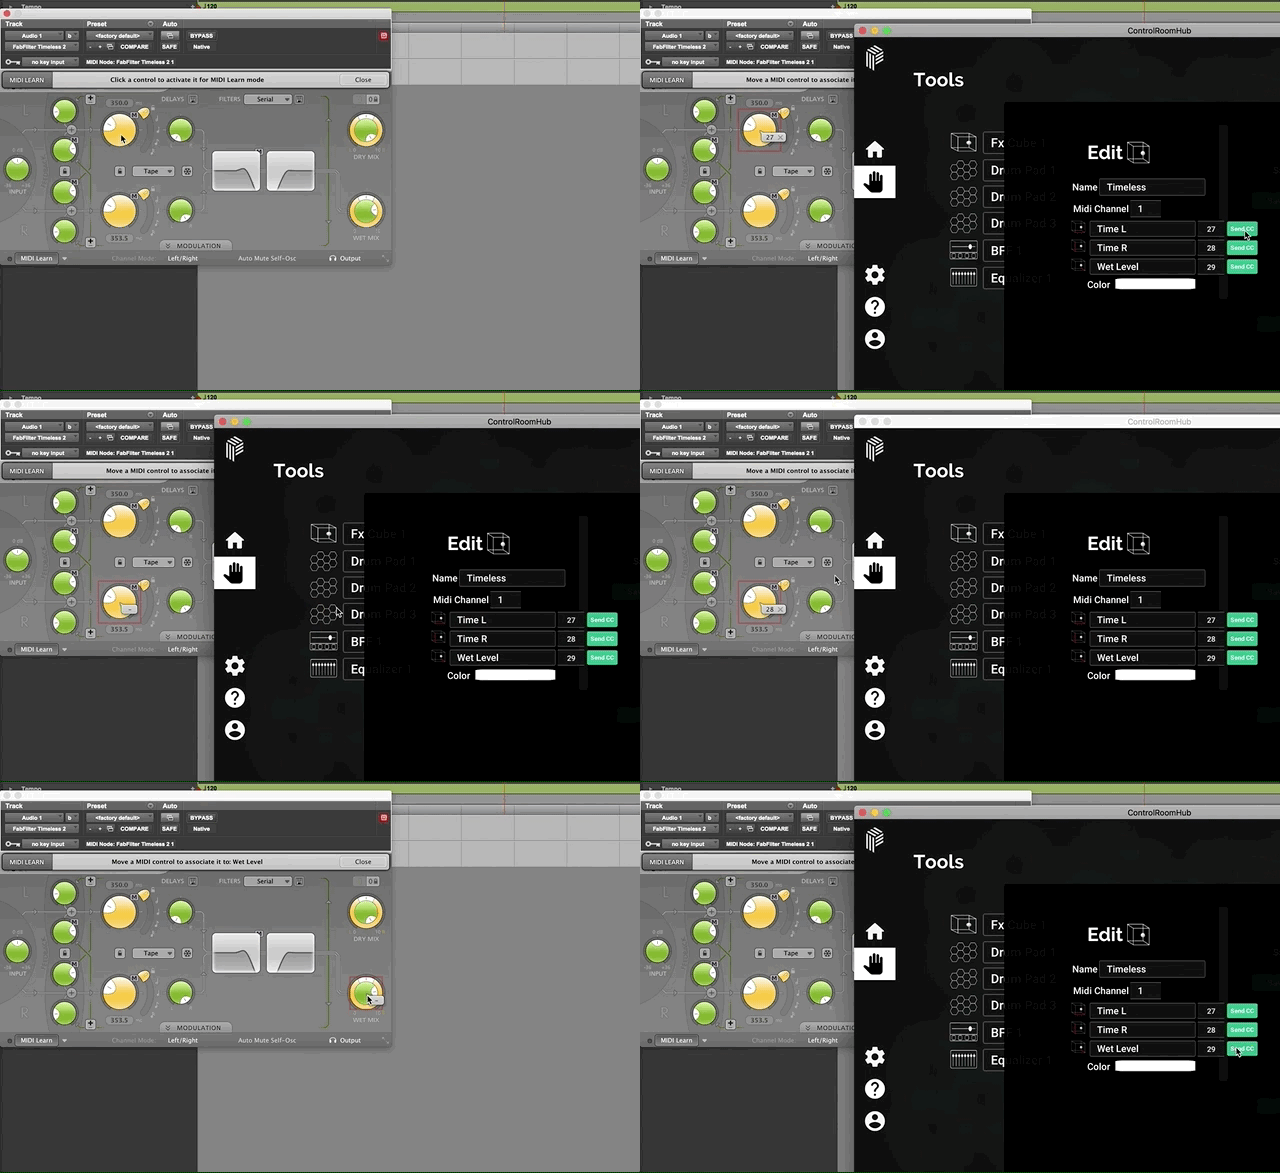
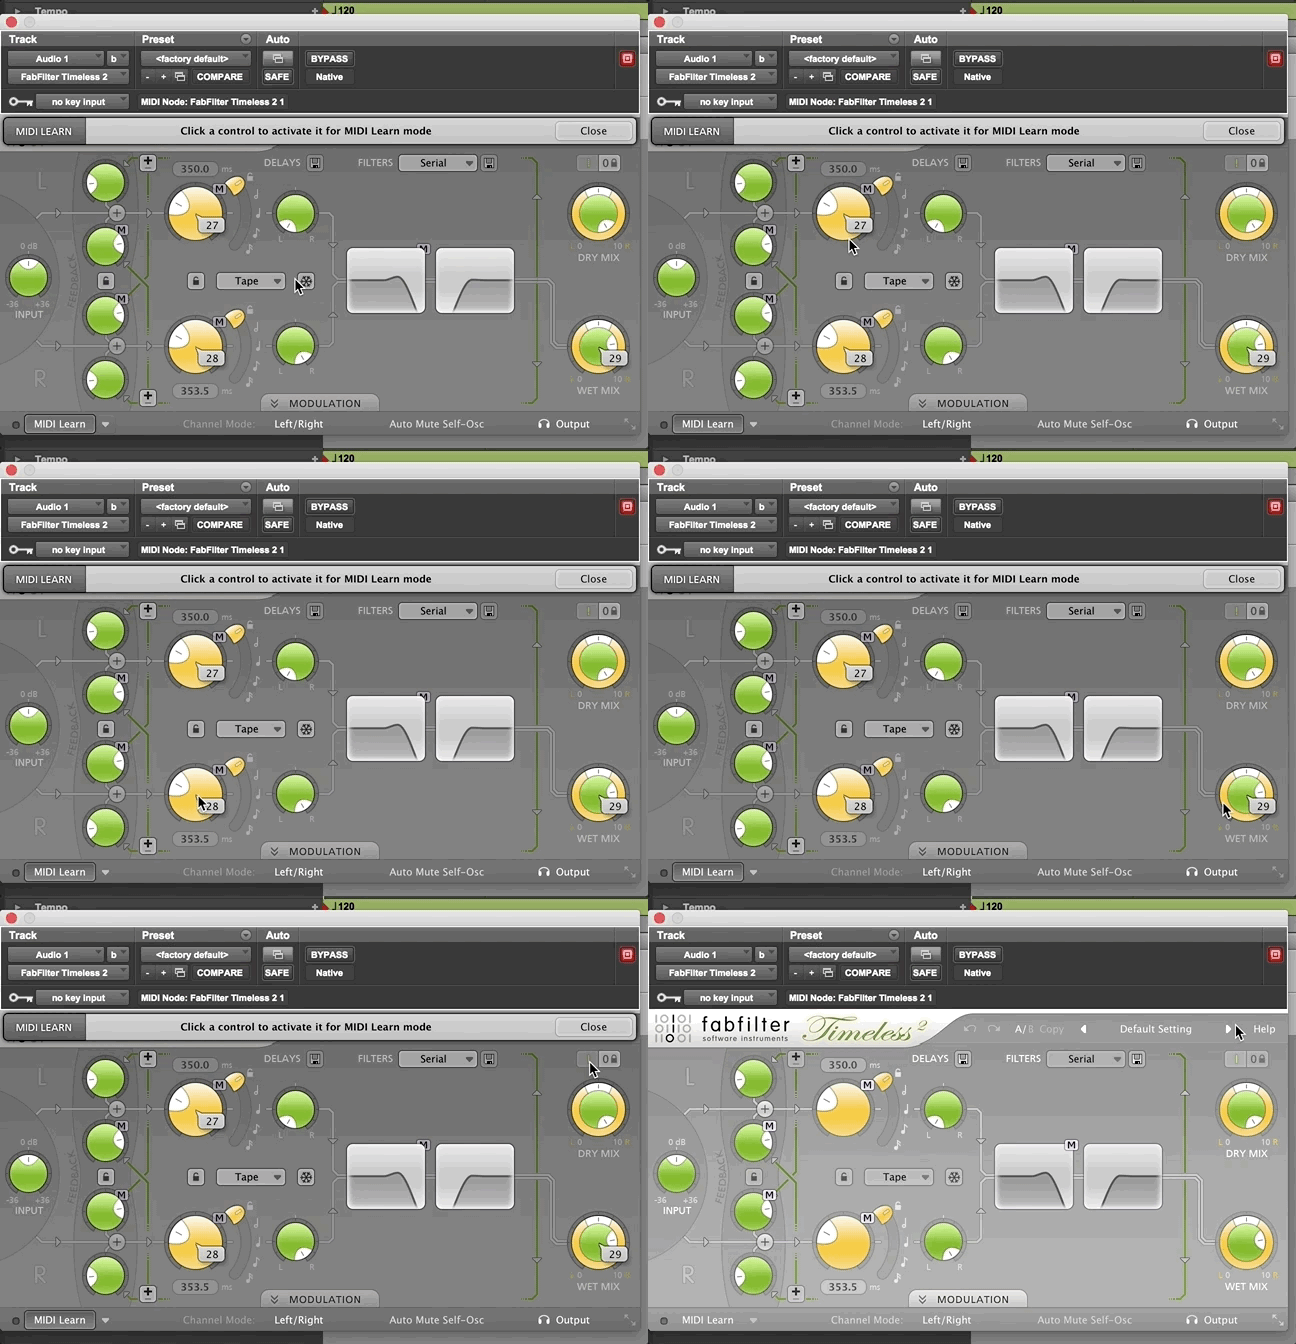
Switch back to Pro Tools and bring up the Timeless window Click the Delay Time L knob in the plugin window. This selects it with a rectangle. Switch back to the Hub, and click the first Send CC button to map the X axis to Delay Time L Switch back to Pro Tools, and click the Delay Time R knob to select it Switch back to the Hub, and click the second Send CC button to map the Y axis to Delay Time R Follow suit to map the wet mix knob. In Pro Tools, click the Wet Mix Knob to select it, and in the Hub click the third Send CC button to map the Z axis to Wet Level
 In Pro Tools, confirm the 3 mappings you just made by clicking on a neutral part of the plugin window and looking for the CC numbers attached to each of those parameters. Exit Midi Map mode by clicking the Close button at top right or the MIDI Learn button at bottom left.
 |
Once you have mapped the three parameters, this mapped tool will be available to you in ControlRoom VR. In VR, press the menu button on your left controller to bring up the menu, then select the Tools page, and turn on the FX cube you just mapped, which should be named Timeless Start playback either on the Console, or using your left wrist transport Move the ball in the FX cube around to fluidly control all three of those parameters simultaneously
|
We recommend that you save your ControlRoom Hub session early and often any time you are mapping midi tools to Pro Tools. |
|
We recommend that you save your ControlRoom Hub session early and often any time you are mapping midi tools to Pro Tools. |
TL;DR
Ensure you’ve completed all the steps in the Setup Process
Use the VR Console to control the Pro Tools built-in mixer
Use the VR Spatial Mixer and Plugin Tablet to control the Channel and Master AAX plugins
Use the Hub to manually map MIDI tools like BFF and FX Cube to compatible third party plugins
noteHave more questions about this process? Check out our FAQ page.
Have more questions about this process? Check out our FAQ page.
