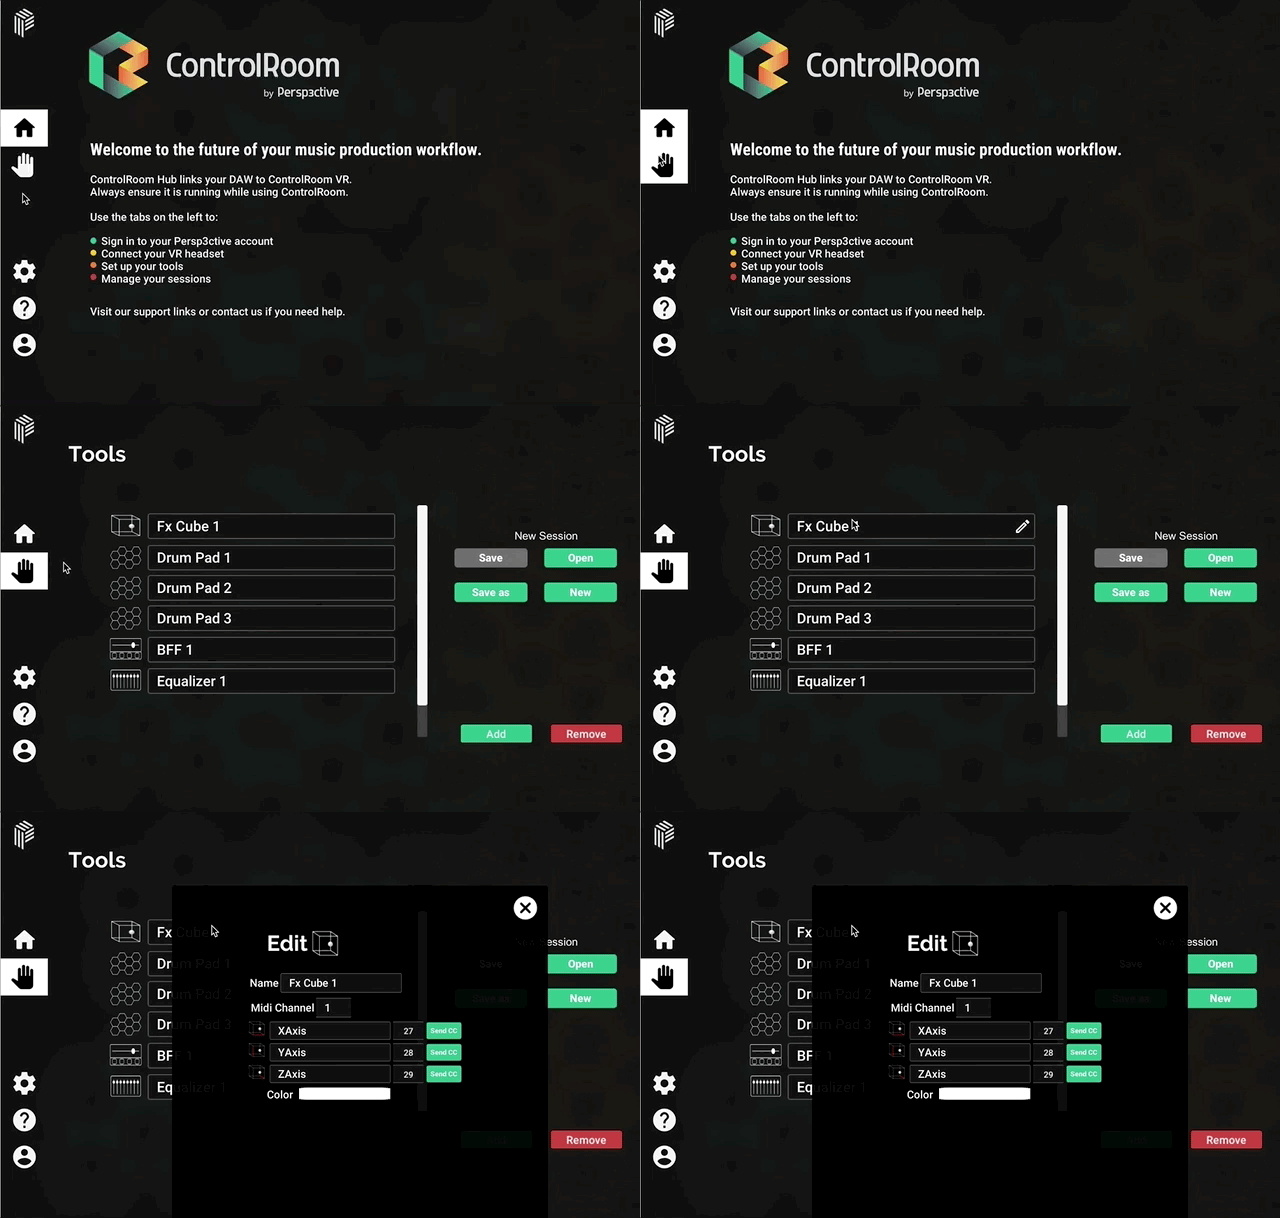
This page covers using ControlRoom with Studio One.
This guide assumes that you have already:
noteIf you have not completed the above steps, use the individual links, or please visit the ControlRoom Setup Overview
Overview
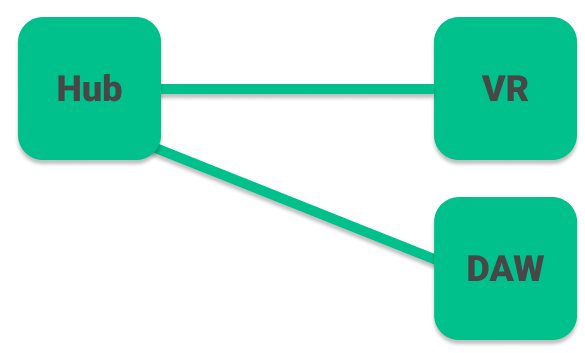
ControlRoom connects with Studio One in two ways simultaneously: General MIDI Device (Map VR MIDI tools to compatible third party plugins) Direct Connection to ControlRoom VST3/AU Plugins (Spatial Mixer, Plugin Tablet, Spectralyzer)
|
Detailed Setup Instructions
Please note, ControlRoom Hub must be running to maintain the connection with Studio One. It can be minimized, but not closed. |
Spatial Mixer and Plugin Tablet

Every instance of the ControlRoom Channel VST3/AU plugin can be controlled from VR with the Spatial Mixer and Plugin Tablet. This provides powerful control over the plugin from within VR, including the Compressor, EQ, Spatial Panner.
Once you have launched your DAW and opened a session file, you’ll need to add an instance of ControlRoom Channel to any and every track that you’d like to control with the Spatial Mixer or Plugin Tablet. We recommend adding it as the last insert in your plugin chain, so that parameter changes in ControlRoom Channel will not affect any processing coming afterwards. Please refer to your Studio One manual for instructions on inserting plugins. |
On your main stereo output, insert only one instance of ControlRoom Master. The master volume will be controllable via the Master Fader on the VR console. ControlRoom Master is designed to be inserted only one time in your session - on your main stereo output. This is because it is the source of timecode, bar|beat information, and master output level metering in ControlRoom VR. If you add more than one instance of ControlRoom Master to your session, proper display of these functions in VR cannot be guaranteed. |
|
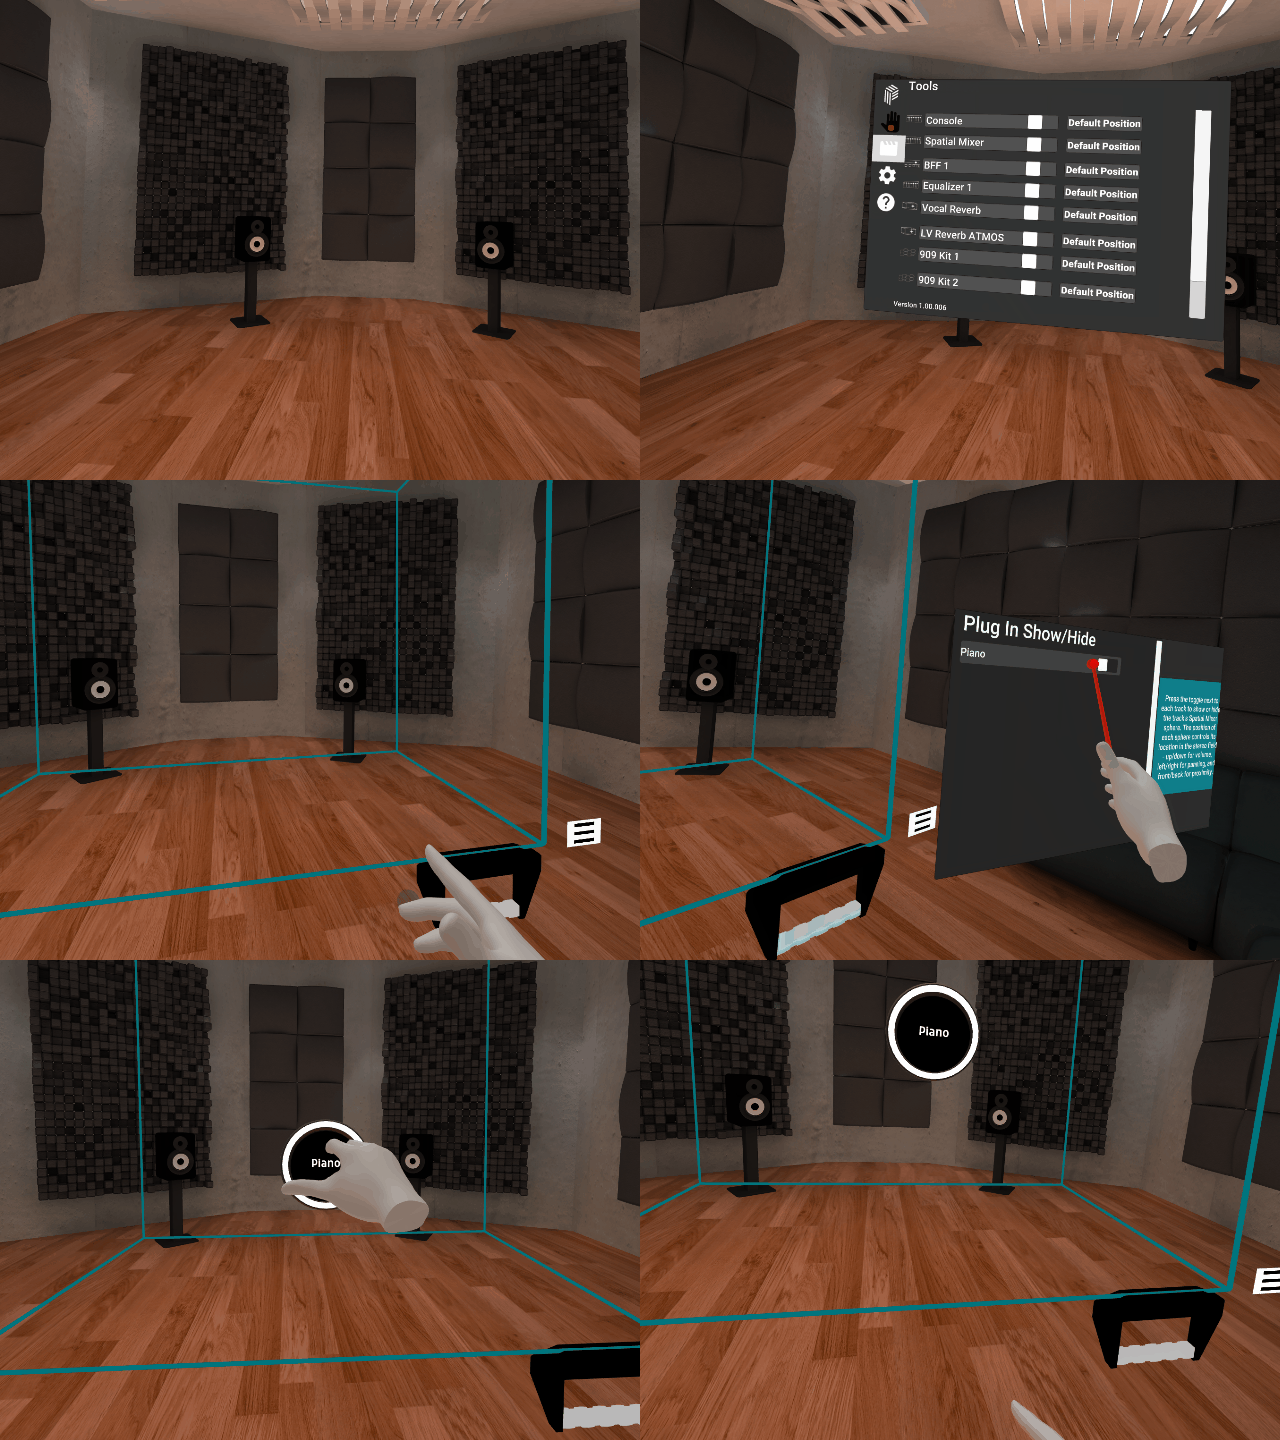
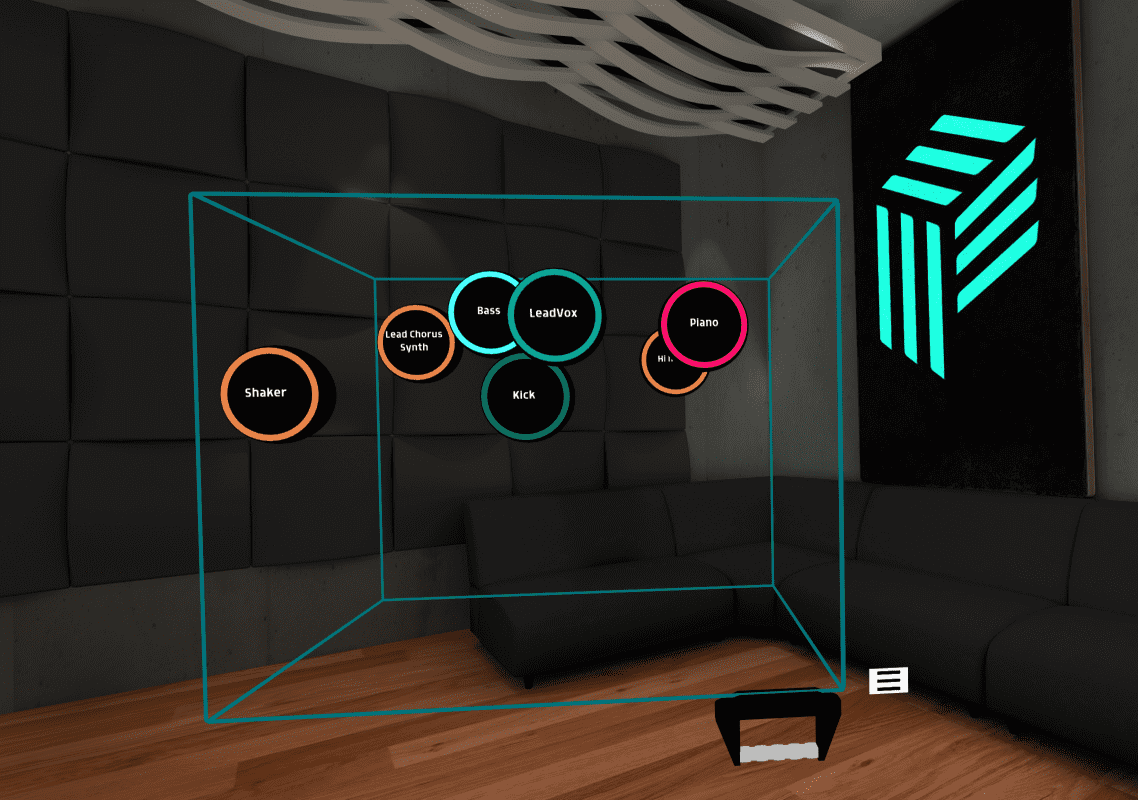
In VR, press the menu button on your left controller to bring up the menu, then select the Tools page, and turn on the Spatial Mixer. (menu in the below GIF is outdated, but the process is identical) Press the menu button at the lower right of the Spatial Mixer, then toggle on any tracks you’d like to control with the Spatial Mixer. Close this menu when you are finished, and return back to it any time you’d like to display different tracks. Move each track sphere up/down for volume, left/right for panning, and front/back for Proximity.
 By turning on plugin automation in Studio One, you can automate proximity, panning, and level simultaneously for an unprecedented level of control over your mix. |
|
In VR, press the menu button on your left controller to bring up the menu, then select the Tools page, and turn on the Plugin Tablet. Press the menu button at the top right of the tablet to select the track you’d like to control with the Plugin Tablet. Close this menu when you are finished, and return back to it any time you’d like to display different tracks. Use the buttons along the top of the tablet to switch between Compressor and EQ control over the selected track.
EQ ControlEach of the 10 bands of the EQ will appear front to back as colored lines. The white line at the rear is the overall EQ curve, summed from the combination of the 10 adjustable bands. Individual bands can be toggled on/off using the X or A button while hovering over each point, or while grabbing it with the trigger. Each EQ band’s point can be moved up/down for Gain and left/right for Frequency. Push the joysticks up/down while grabbing a point to adjust that band’s Q value.
Compressor ControlAll parameters of the Channel compressor are shown here. Toggle pyramid on/off by selecting the pyramid icon at the top right of the tablet. The pyramid allows you to control Ratio, Threshold, Attack Time, and Release Time Height of the tip of the pyramid for Ratio Height of the middle line for Threshold Horizontal position of the bottom left and right sides for Attack Time and Release time, respectively.
|
Map ControlRoom Midi Tools to Plugin Parameters in Studio One
There are numerous MIDI tools in ControlRoom that can be mapped to control parameters in Studio One, including your favorite third party plugins. Follow the steps below for an example of how to map the FX Cube to a few plugin parameters in Studio One.
noteStudio One provides a very powerful system for managing external MIDI devices and mappings. With great power comes great responsibility. We recommend familiarizing yourself with the Studio One MIDI mapping system by reading the Control Link section of their reference manual.
Studio One provides a very powerful system for managing external MIDI devices and mappings. With great power comes great responsibility. We recommend familiarizing yourself with the Studio One MIDI mapping system by reading the Control Link section of their reference manual.
It’s helpful here to use Command-Tab (Mac) or Alt-Tab (Windows) to quickly switch back and forth between the Hub and Studio One windows. |
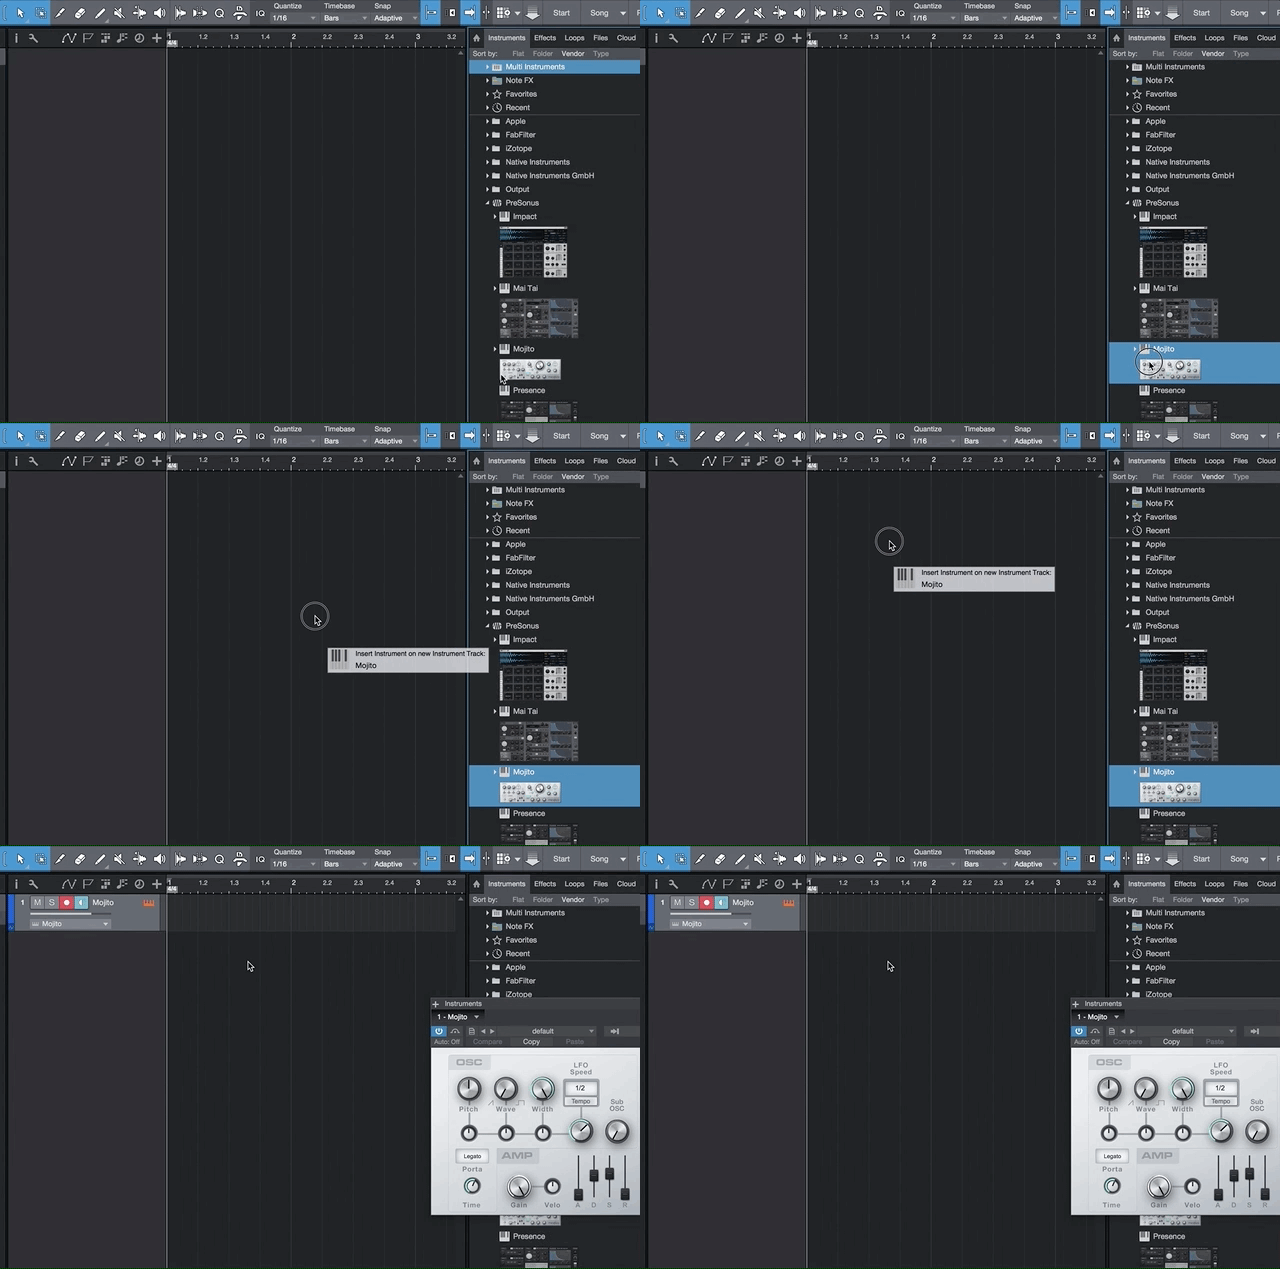
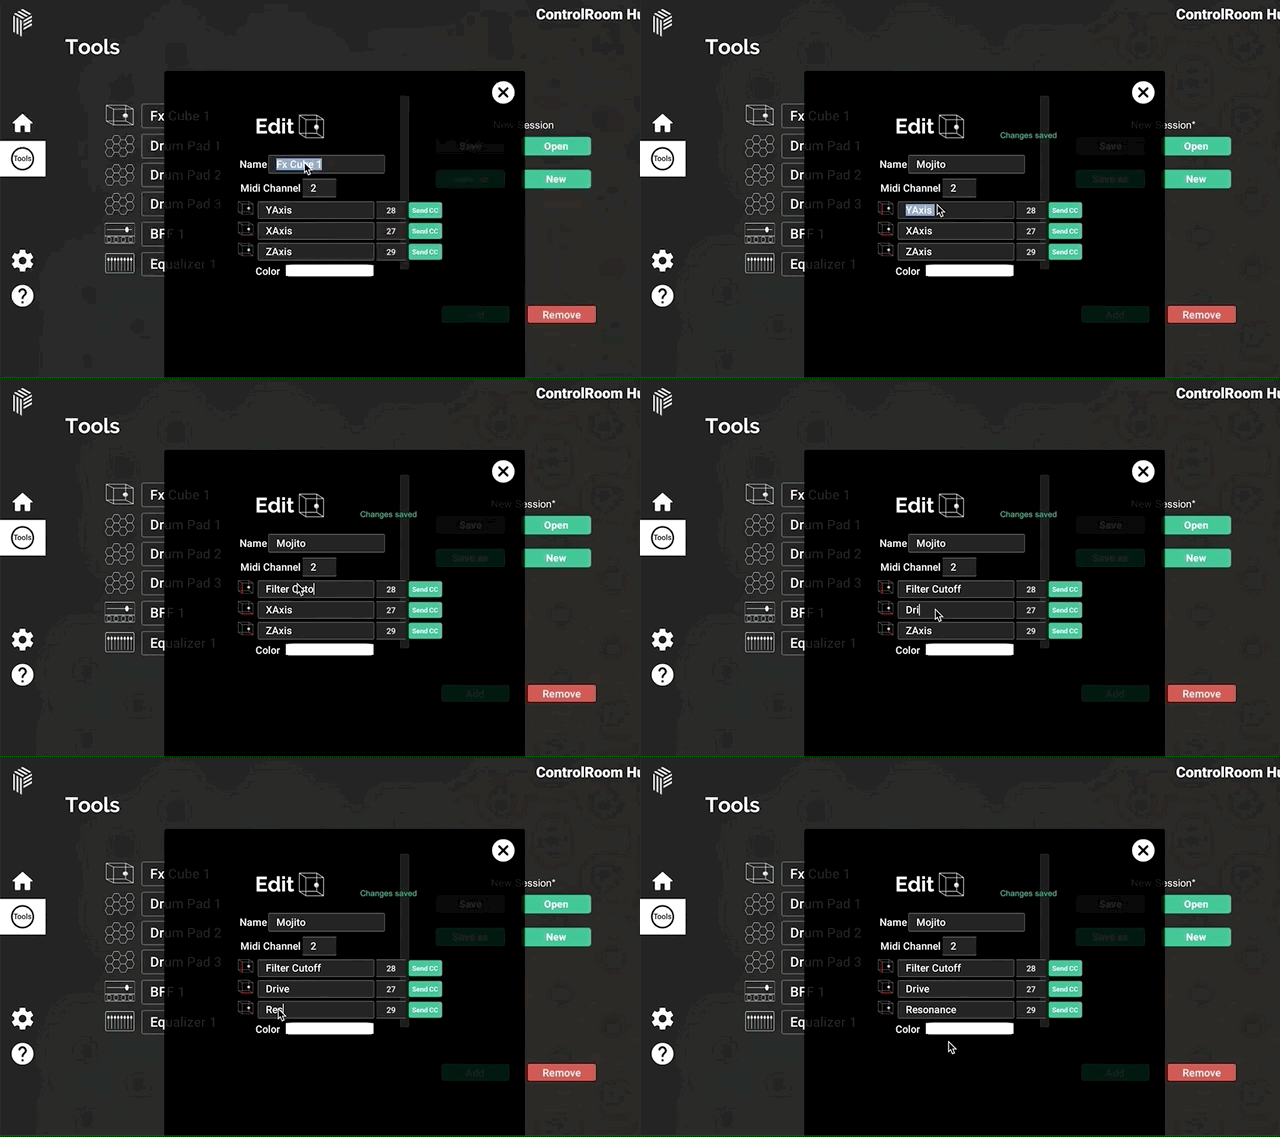
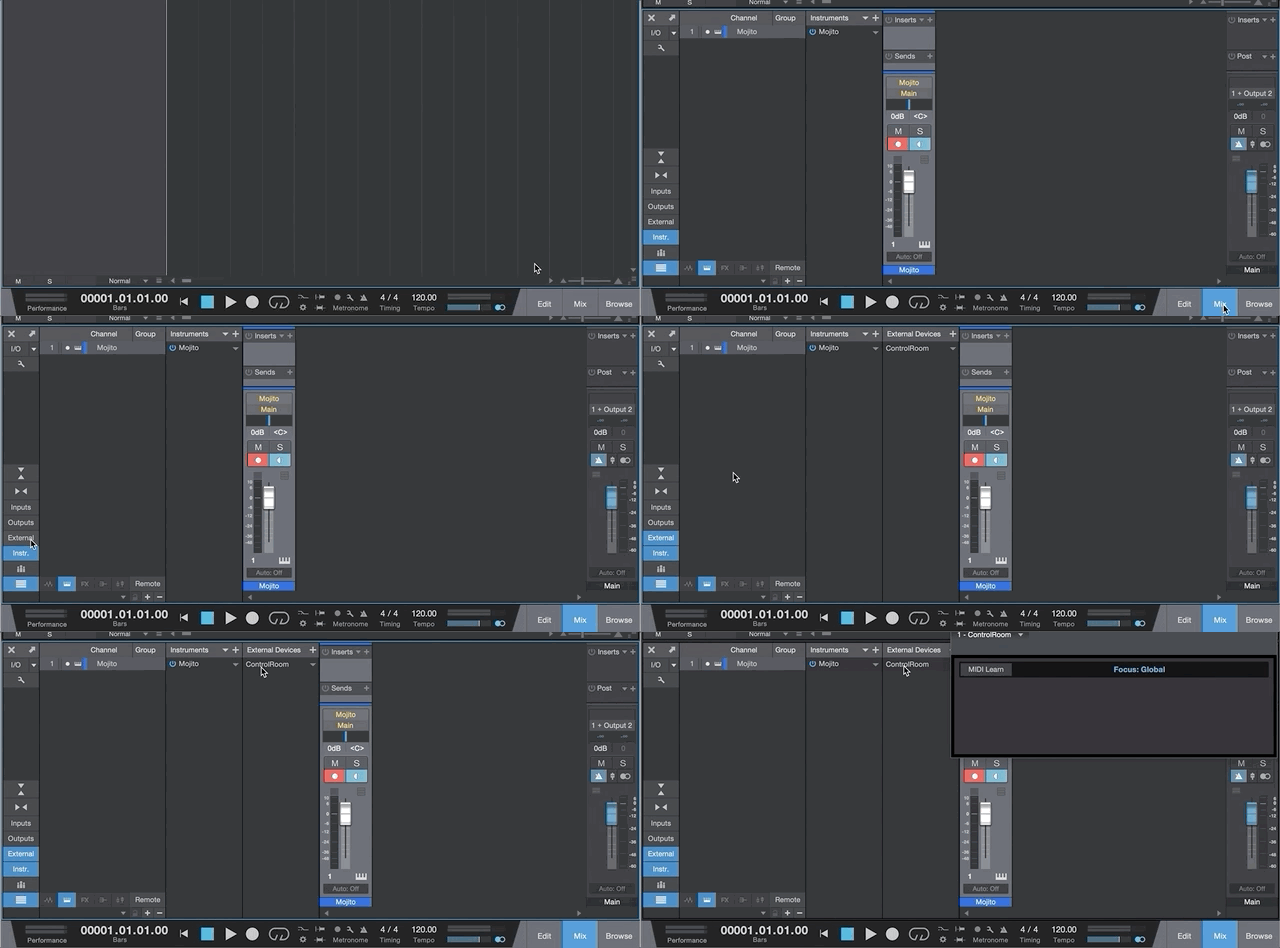
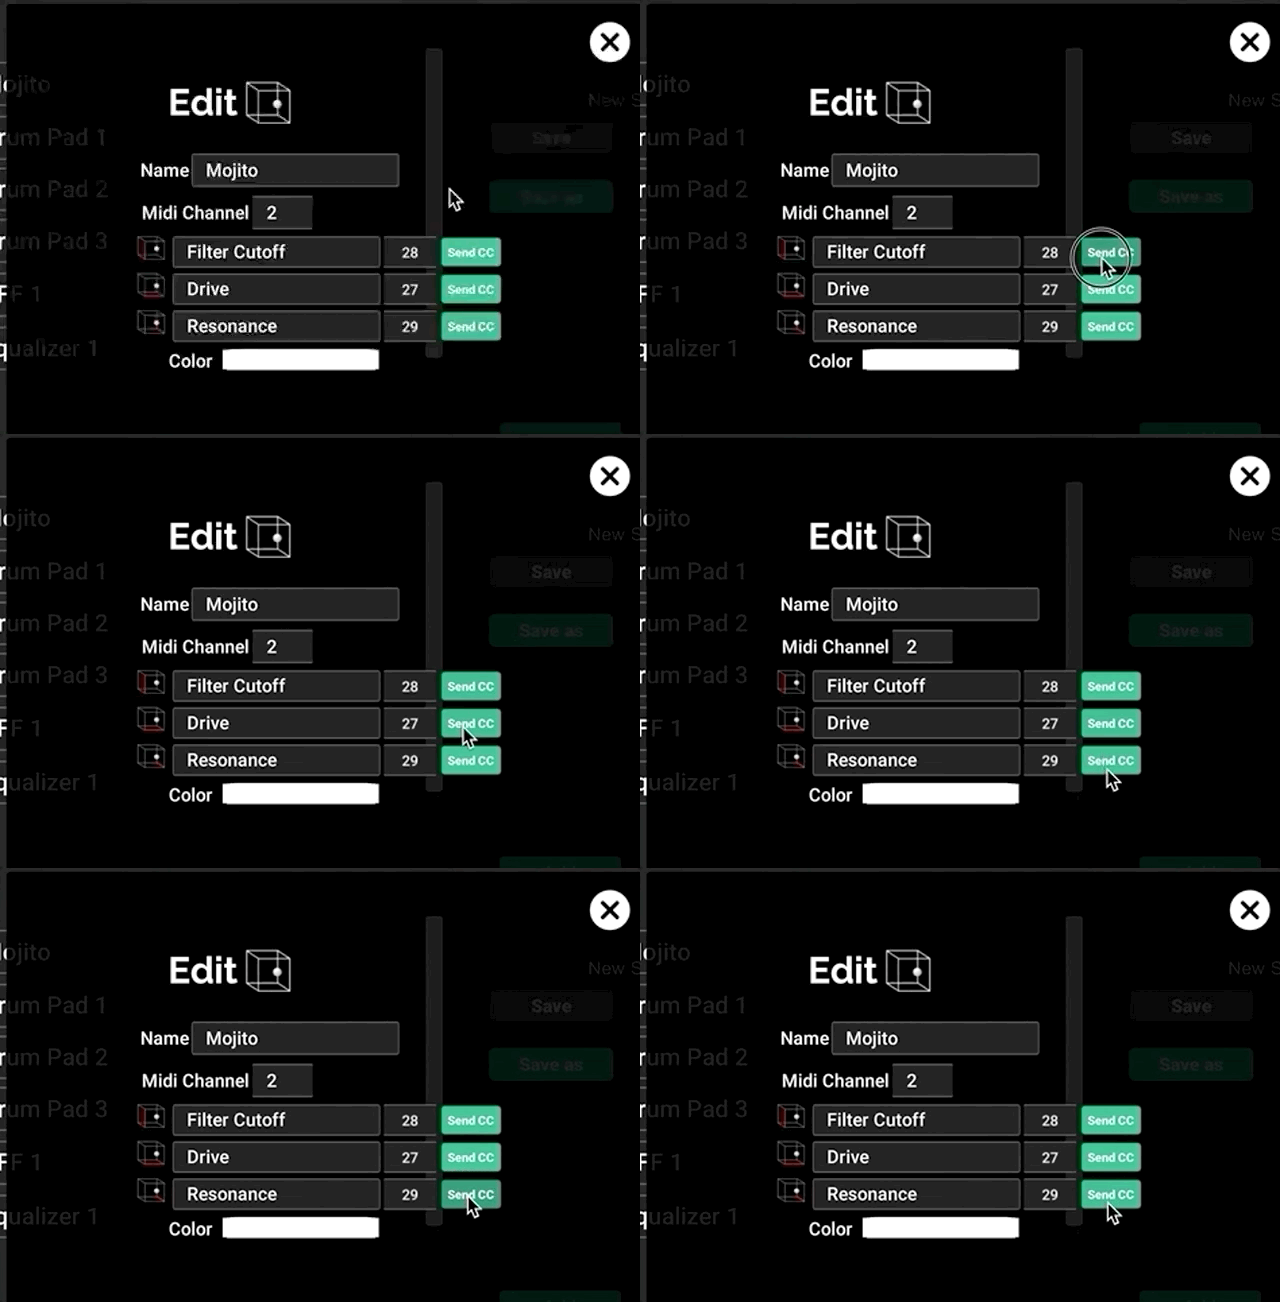
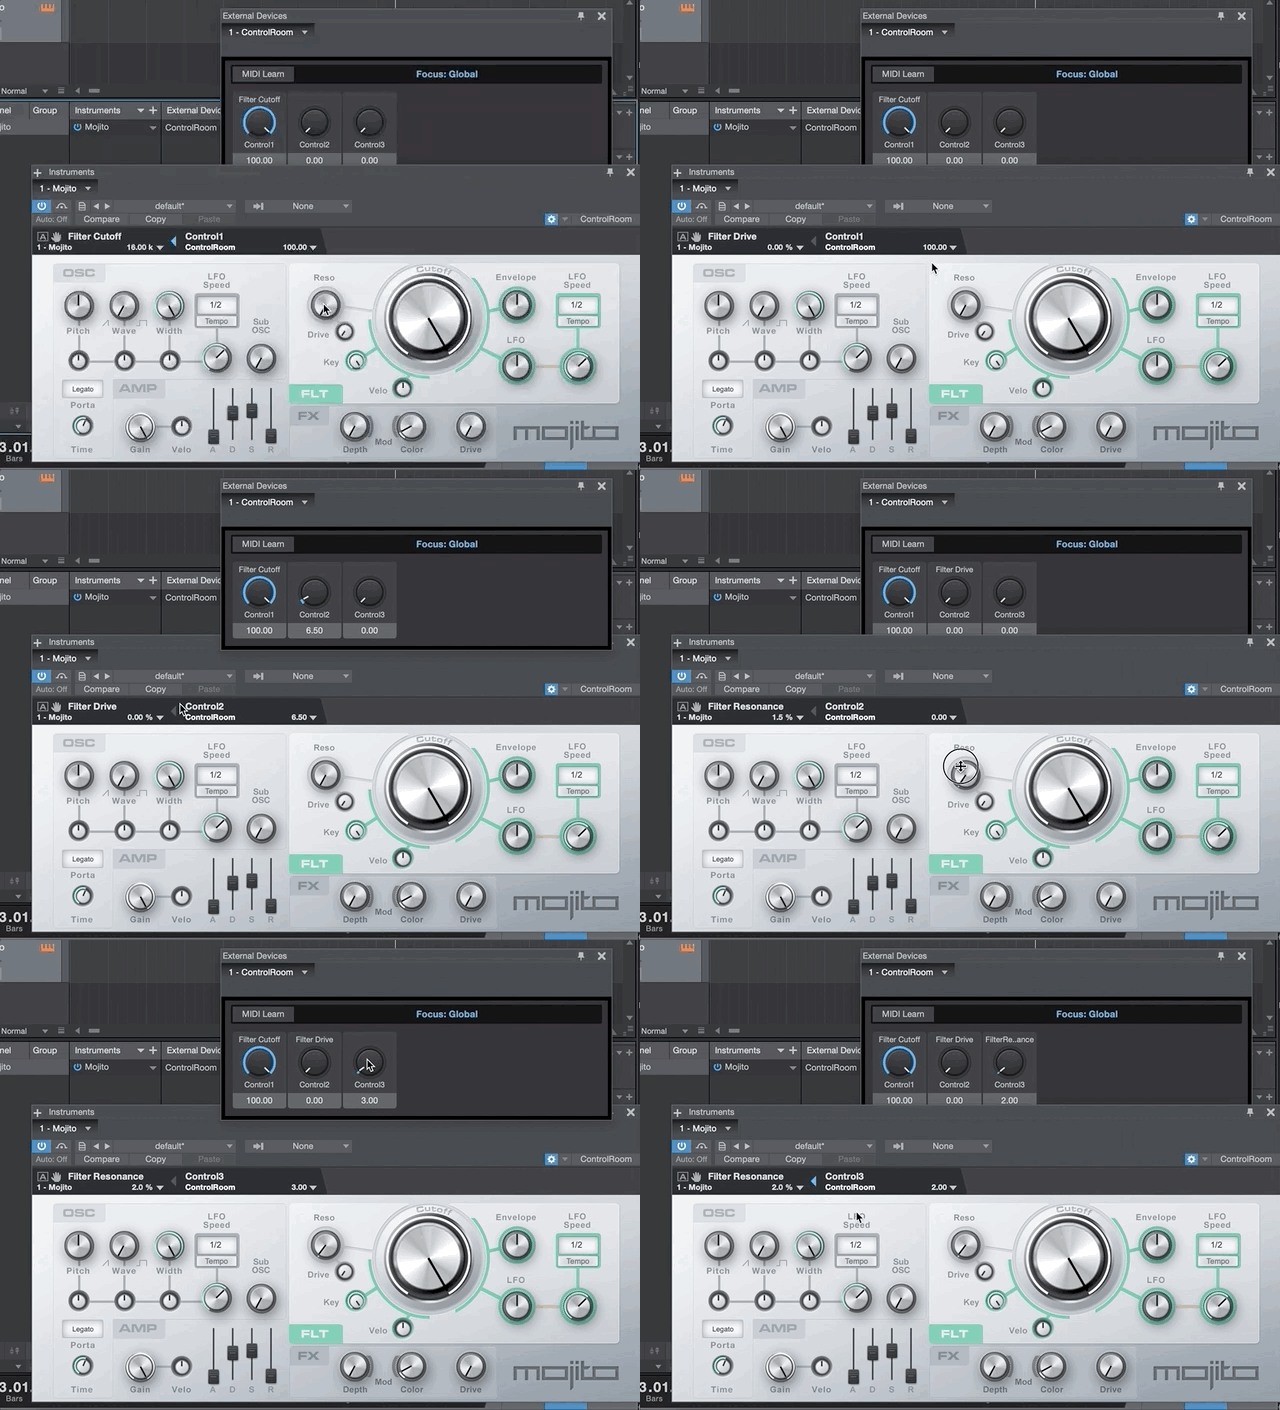
For this example, let’s create a new instrument track by dragging the Mojito instrument into the main window. We can map any parameters of this plugin that we like- for this example we’ll map Filter Cutoff, Drive, and Resonance.  |
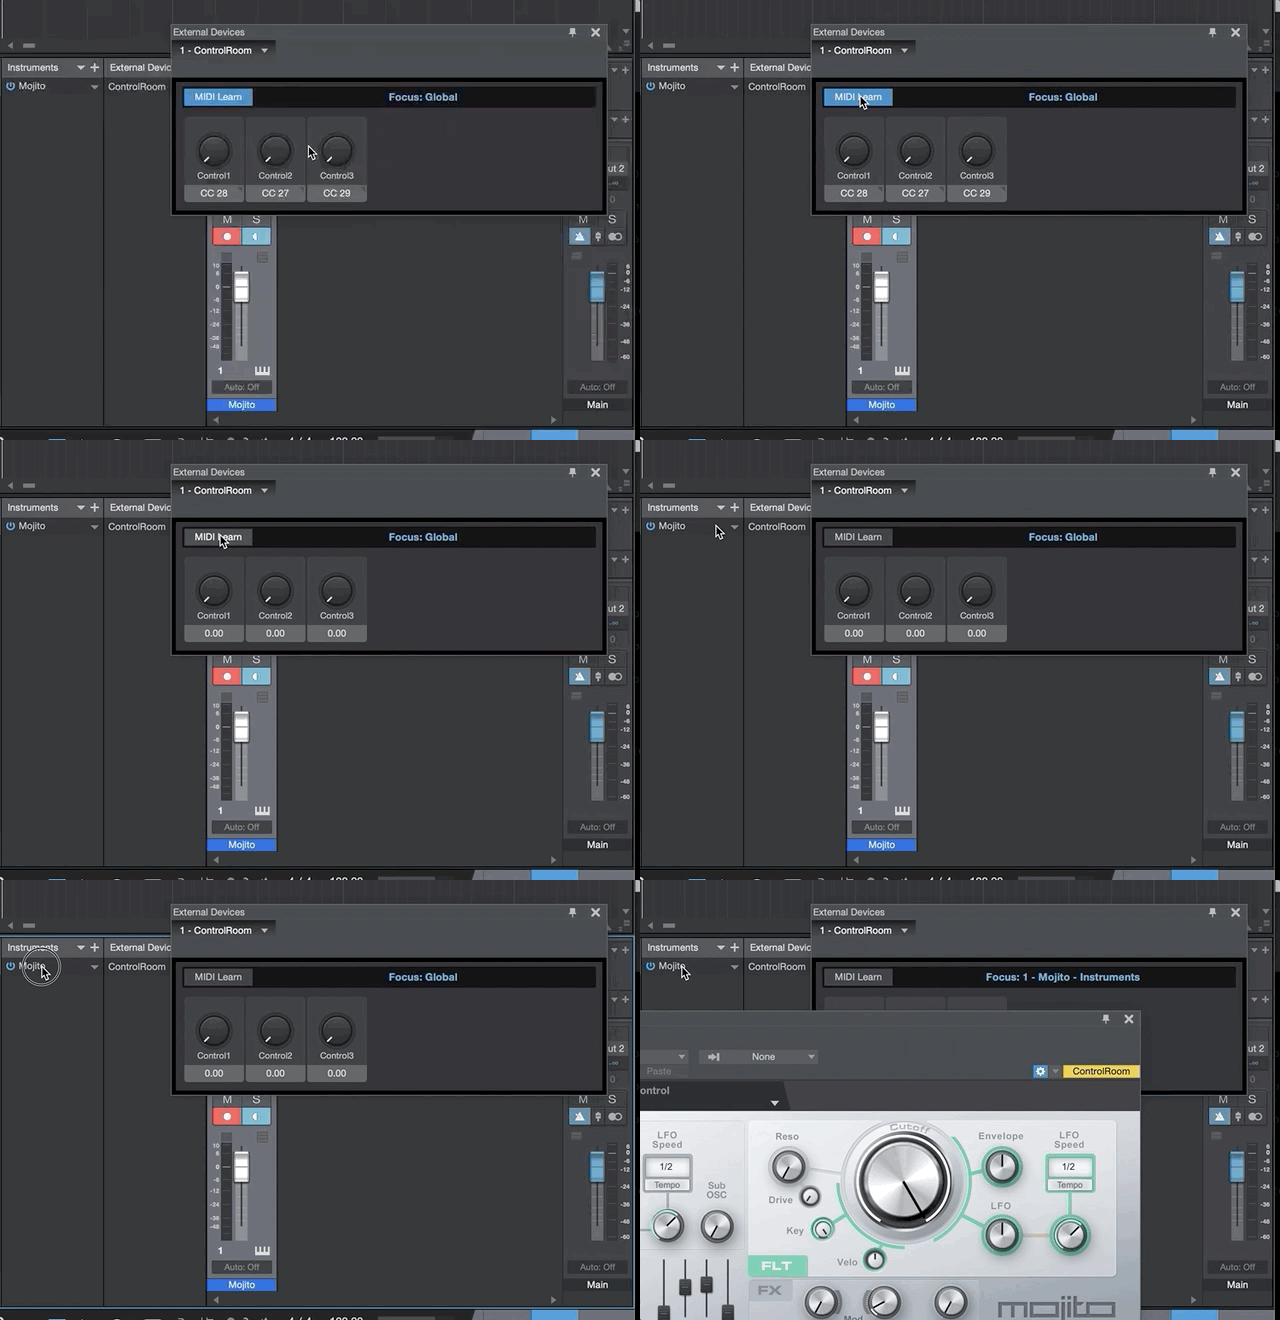
In Studio One, enable the External window within the Mixer view, and double-click ControlRoom. If you don’t see ControlRoom in the External Devices panel, be sure you have completed the steps for connecting ControlRoom Hub with Studio One.
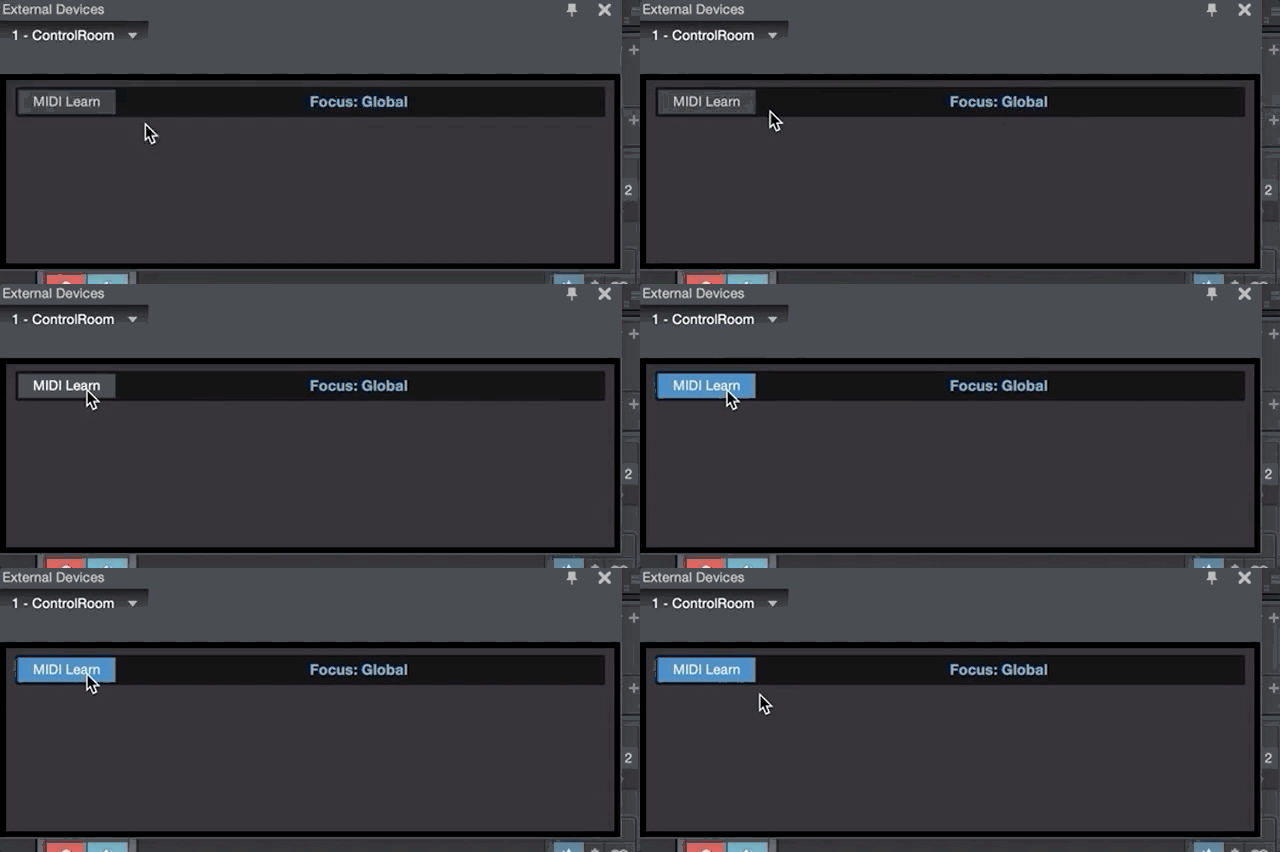
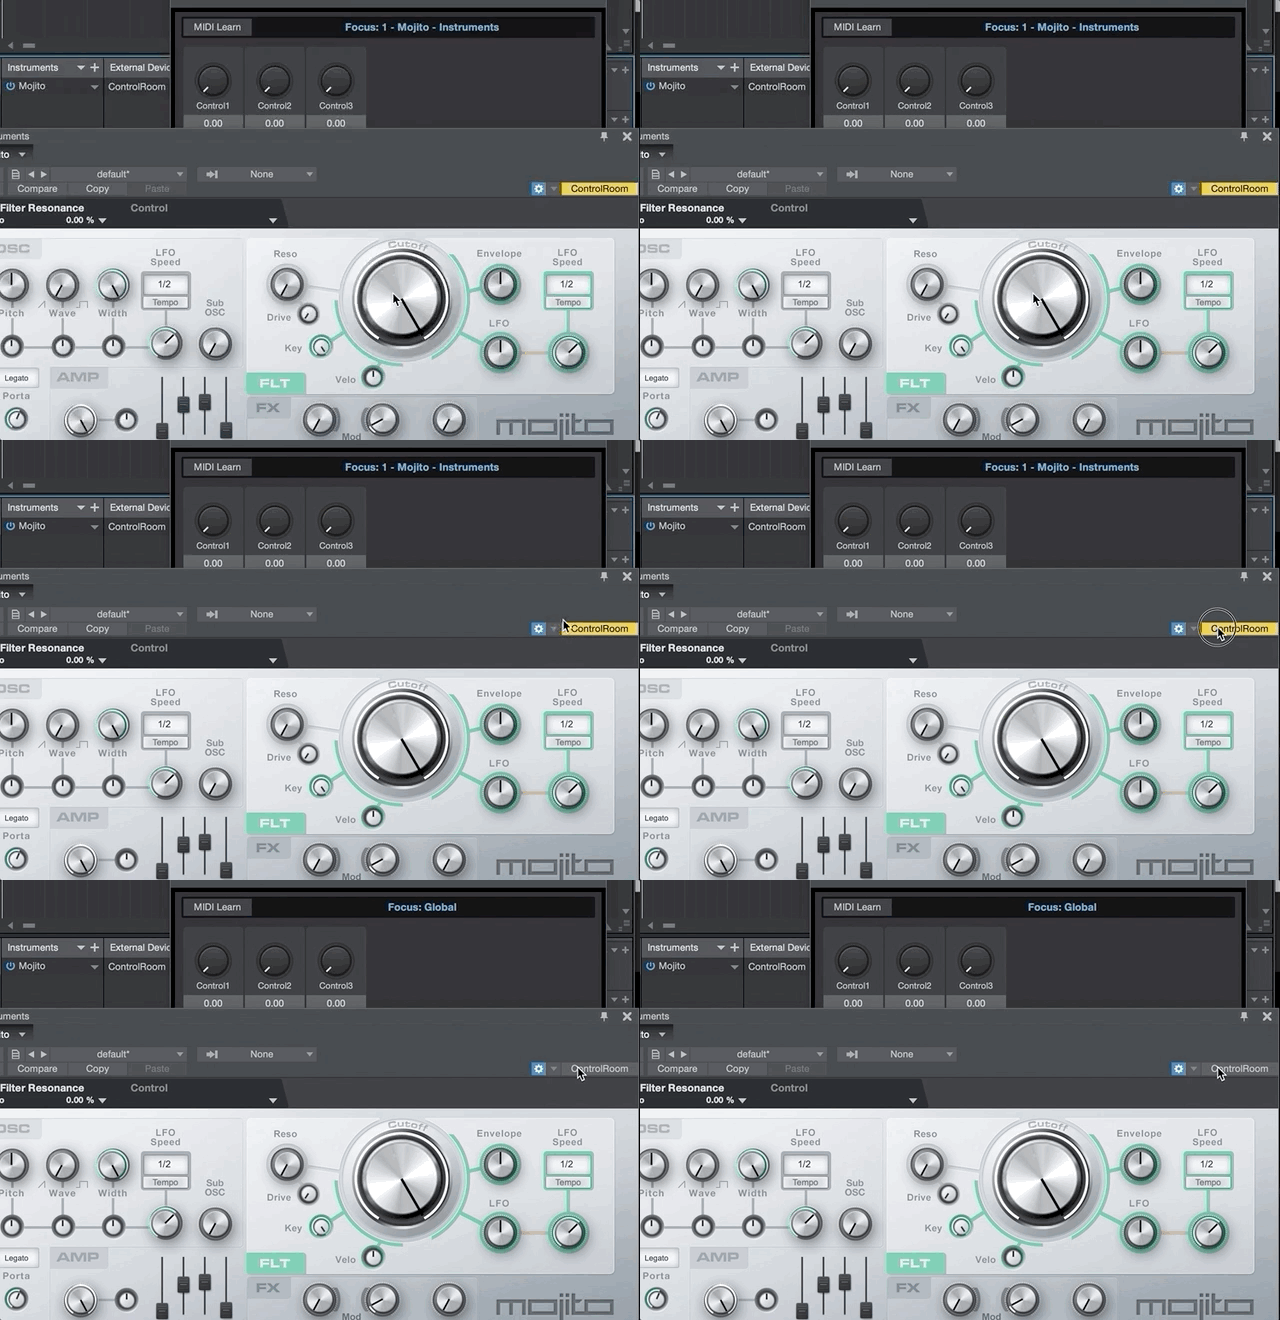
 In the Studio One window that has just opened, click MIDI Learn so it’s highlighted blue.  In the Hub, click each of the Send CC buttons for each of the XYZ parameters, so that Studio One recognizes them.  In Studio One, turn off MIDI Learn mode, and open the Mojito plugin window. 
|
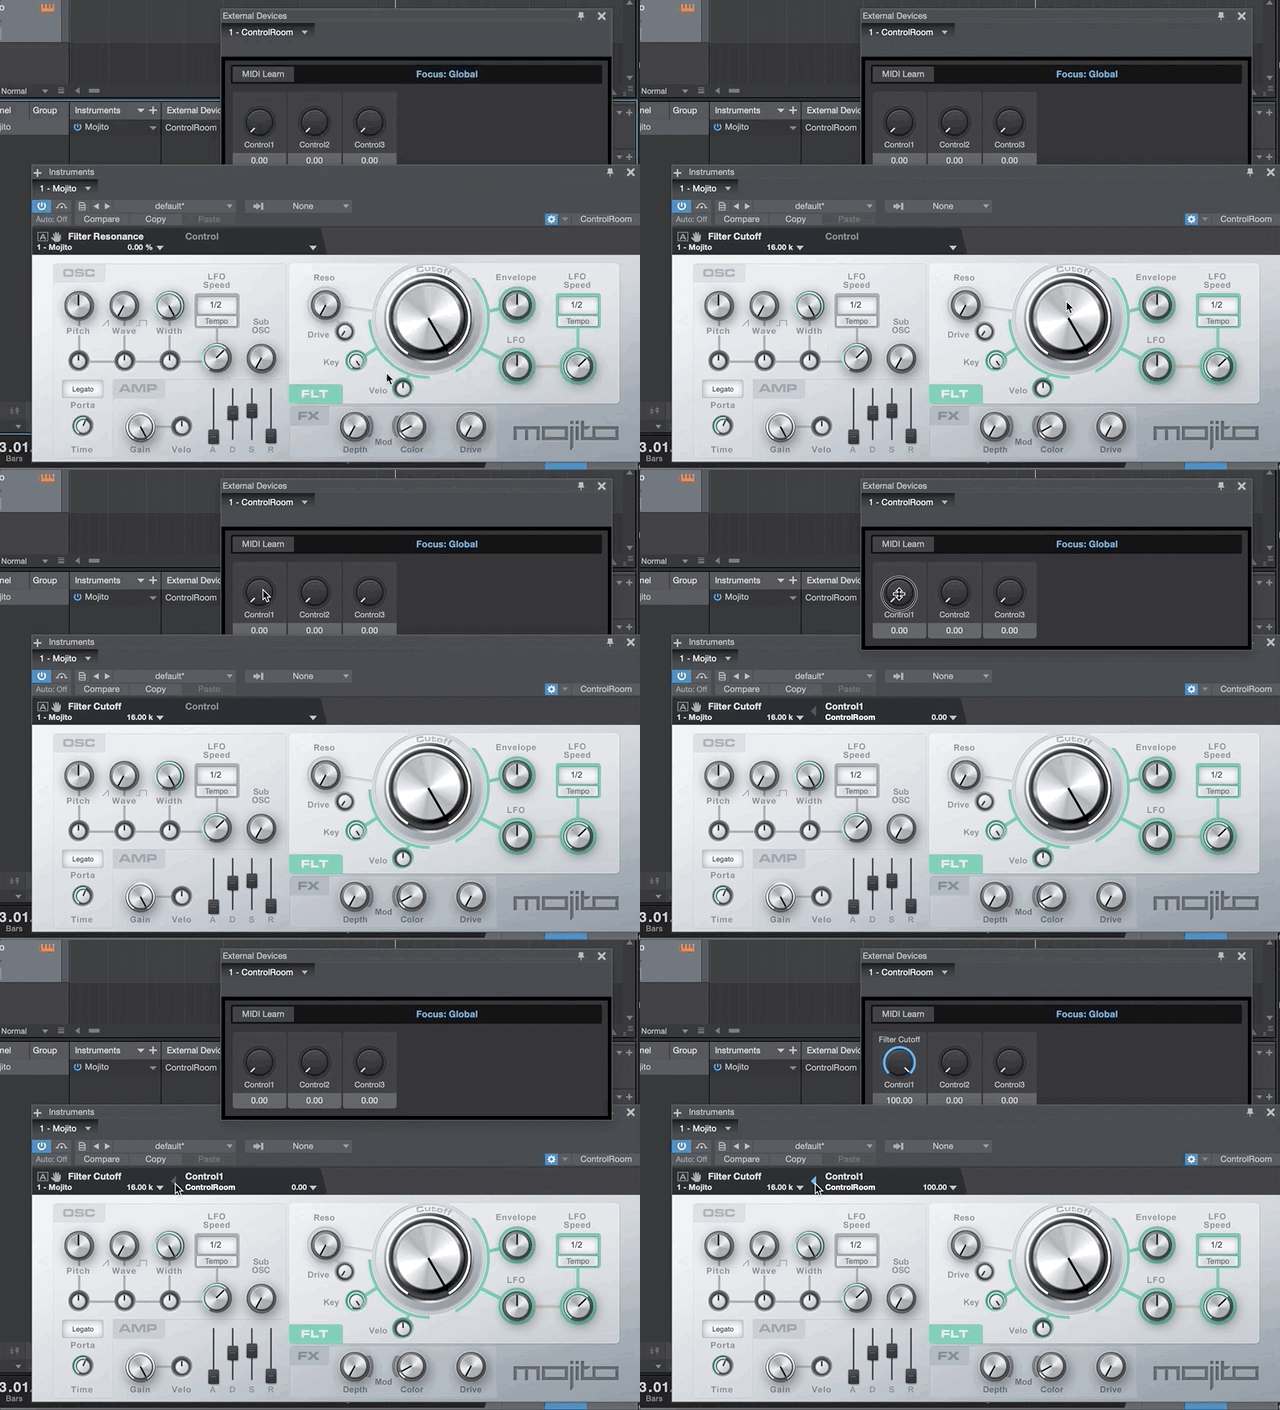
For this step, we recommend being familiar with the difference between Global and Focus MIDI mappings in Studio One. Since we are naming our FX Cube with specific parameters for this example, we recommend using Global mode. This way, even with the plugin window closed, we’ll always be able to control the Filter, Drive, and Resonance parameters of this instance of Mojito. |
|
Once you have mapped the three parameters, this mapped tool will be available to you in ControlRoom VR. In VR, press the menu button on your left controller to bring up the menu, then select the Tools page, and turn on the FX cube you just mapped, which should be named Mojito Move the ball in the FX cube around to control all three of those parameters simultaneously
|
Once you have mapped the three parameters, this mapped tool will be available to you in ControlRoom Mobile. In ControlRoom Mobile, go to the Tools page by tapping the Tools icon at the bottom right. Select the FX Cube tool you just mapped, which should be named Mojito Touch and hold on the screen while moving your phone in space to control all three of those parameters simultaneously.
While you are touching the screen, MIDI data is being sent. Simply remove your finger from the screen to be able to move your phone without sending MIDI data. |
noteYou can lock each of the X, Y, or Z axes to prevent MIDI data being sent for that parameter. Simply tap the parameter name to lock or unlock that parameter.
You can lock each of the X, Y, or Z axes to prevent MIDI data being sent for that parameter. Simply tap the parameter name to lock or unlock that parameter.
|
We recommend that you save your ControlRoom Hub session early and often any time you are mapping midi tools to Ableton. |
|
We recommend that you save your ControlRoom Hub session early and often any time you are mapping midi tools to Ableton. |
noteHave more questions about this process? Check out our FAQ page.
Have more questions about this process? Check out our FAQ page.
Related articles
The content by label feature displays related articles automatically, based on labels you choose. To edit options for this feature, select the placeholder below and tap the pencil icon.

